Howdy, all. First post here. Recently came upon a stash of computer goodies from the 80's at work, via a colleague.
I've inherited various electronics in the past, but most have been stored in either a temperate climate or climate controlled areas. These have been stored in the humid subtropics of coastal Louisiana

 IMAG1113
 by
renault9gta, on Flickr
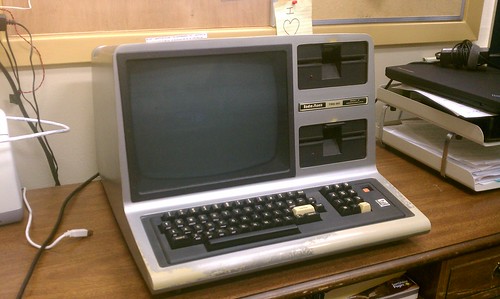
First off, a TRS-80 model 3. First thing that colleague wanted to do was power it up. first thing I did was take it apart and point at the capacitors connected across the mains input that were likely to go bang. That's currently in a state of non-assembly awaiting caps for the power supplies.
Had a couple of not-so-interesting laptops that either did nothing or booted up. The did-nothing ones were inadequately interesting to even bother with, plus, when the paint is peeling off the case and it smells of cat wee... I'm not going to bother.
Next two were halfway written off by me as soon as I saw them. A Compaq Portable 386 (the small beige case, bigger than a shoebox with the keyboard that clips into the front and orange gas-plasma display) and an original Compaq Portable "Luggable".
Those two came home in the back of my pickup truck (filthy!) and were subjected to "let's plug them in outside and see which one produces the bigger bang" because they had both been stored outside in a garage for about a decade.
They both went bang and let out a not-inconsiderable amount of smoke. the larger of the two, after some thought, was brought inside and stripped down. The little 386 sat outside, in the rain, overnight.
Threw the case off the Portable and deposited it into the dishwasher. Stripped the boards down and discovered the source of the pyrotechnics.
 Pop!
Pop! by
renault9gta, on Flickr
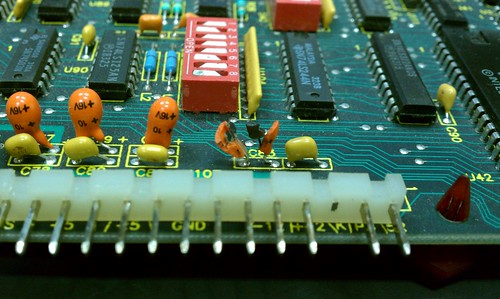
Several 10uF 16V tantalum capacitors, connected across various power rails went pop. Had a dig about, decided that seeing as the board actually powered up off a spare "known good" PSU without any further signs of distress they were ok to replace with aluminium can wet electrolytics. Plugged it in and got a series of POST beeps. Grabbed the video card, which has CGA/Mono output on a 9-pin D-sub connector externally and a row of pins inside to connect to the internal monitor.
Noticed that it also had a composite output on the card. After replacing a few bad caps there, the board came up, plugged into a TV set.
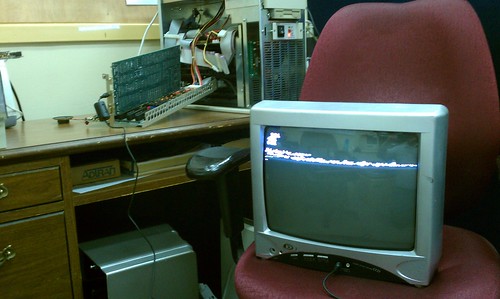 Compaq PC first signs of life
 by
renault9gta, on Flickr
It's not ground bonded, it's missing two of the +5v stabilised rails but that's definitely signs of life right there.
Replaced yet more exploded tantalums on the power supply, carefully reassembled everything the powered up just the motherboard and VDU board.
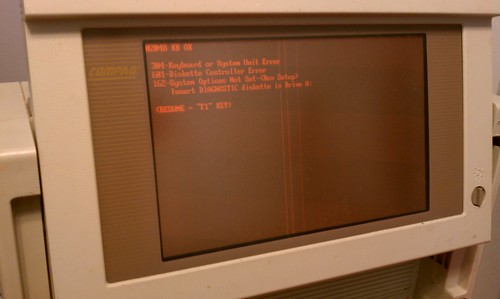
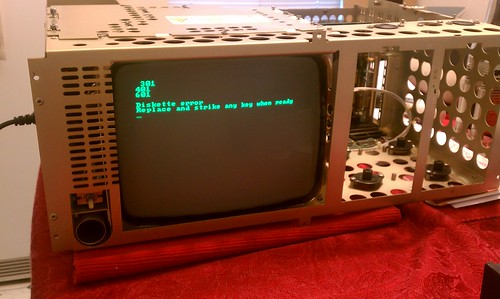 Compaq portable is alive
 by
renault9gta, on Flickr
Ok, so that's what the message on the TV set was meant to be.
Found yet more bad caps on the floppy drive controller board, got that in along with a the floppy drives. Hard disk required several thumps to free up the read arm... it booted up into Compaq PC DOS 3.10 right there.
At this point I looked outside, the following day and the 386 is still sat beside my mailbox in the verge. I headed out with a screwdriver, dismantled it out on the tailgate of my truck, liberated as many of the earwigs and ants as I could and brought it in out of the elements.
After another capacitor hunt-and-replace from the pile of new spares here:
 10uF 50V electrolytic
 by
renault9gta, on Flickr
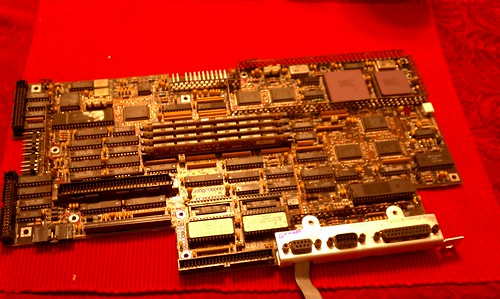 IMAG1120.jpg
 by
renault9gta, on Flickr
Came up fairly clean. Interesting form factor. Came with a couple of bonuses- 387 co-processor and RAM upgrade (2Mb!) with a two-ISA-slot expansion "carbuncle" that clips to the back of the case.
 Compaq 386, alive
 by
renault9gta, on Flickr
I guess I was too quick to write it off. Even the hard disk tests 100% free from errors, the case and keyboard have cleaned up to looking like new, only need to get a few driver issues sorted for the plasma display (640x400 MDA) but it boots into 3.11 for Workgroups...
Fought with the Luggable a bit more last night as the keyboard refused to work. Took it to bits and it's a capacitative keyboard, apparently as used in some Sun computers, Acorn/BBC, Tandy etc. A little silvered Mylar disc attached to a foam pad attached to the underside of the key. Pressing the key brings the metalized disc into proximity with a pair of pads on the keyboard PCB, altering the capacitance, causing the thing to register the keystroke.
Fine, but a) the foam has disintegrated and b) all the silver has fallen off the Mylar. Pushing a mylar disc up towards a PCB doesn't do anything! Discovered that touching the pads causes the keyboard to register keystrokes.
*deep intake of breath*
Well, that was a lot of bamf to read through.
Now, I have a question. The RAM expansion/Serial port/real-time clock board has a battery soldered to it, which has caused the surrounding board to be covered in greenish crystals. Plugging it in causes "PARITY CHECK 2" on the screen, so I'm guessing there's some real bad connections on the RAM sockets, which are green.
I'm guessing the battery is a NiCd, being 3 cells rated 3.6V - any clue how best to remove this muck?
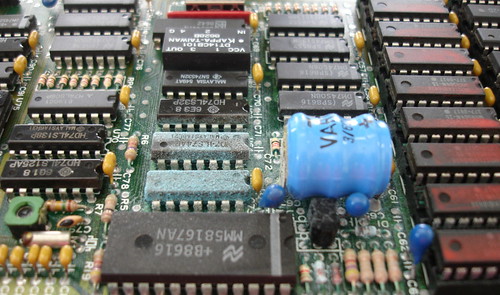 battery_dreck
 by
renault9gta, on Flickr
I'm not a chemist, but I'm guessing that's a component of copper there- don't know if it's acid or alkaline, what will remove it without dissolving the rest of the board and damaging things..?
Thanks for reading, by the way

--Phil


