What do you guys think, how high should the shelf (for measurement equipment) be from the tabletop?
450 - 500mm would be where you'd want it IMHO.
Any reason not to use adjustable shelving rails and shelf brackets or tabs attached to the structural members that will hold the shelves?
I'm most likely going to make the frame out of 45x45mm aluminum profile...
How will it attach together, particularly where an end butts up against the side of another?
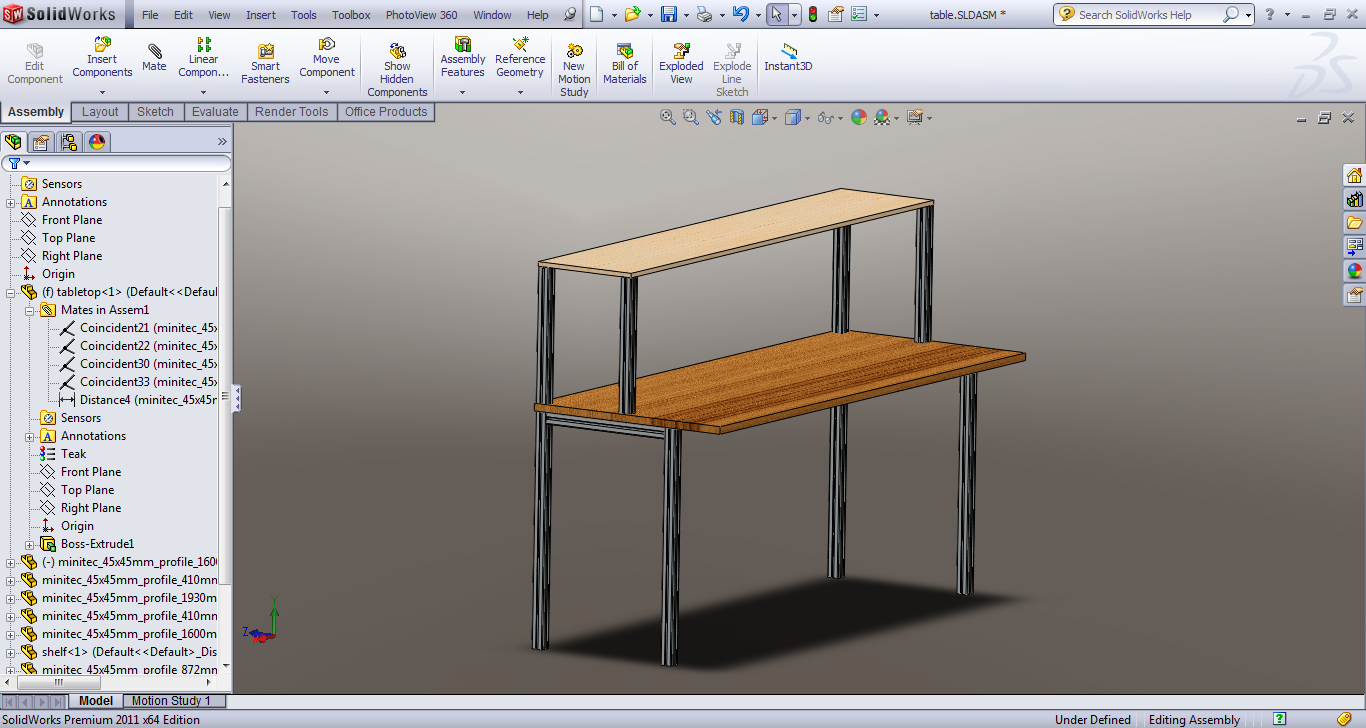
The tabletop is 900mm off from the ground (like Dave recommended), shelf is 400mm deep and half a meter from the tabletop (so 1.4m from the ground), does this sound reasonable?
If you plan to stand or use a stool, this is fine. If you'll be using a standard office chair, it's too high. You'd want it ~750mm tall for a standard height office chair.
Here's what I have so far (a quick lash-up in solidworks):
 .
.
What about bracing near the bottom (2 sides & back). That will leave the front open to get a chair underneath it.
FWIW, I'm in the process of building a bench myself out of welded steel (
pics). Not the most recent, but will give you an idea.
The attached image is essentially how I've built it in terms of layout, only the second cross member on the bottom (one in the middle you'd be able to put your feet on) wasn't installed.


