Author Topic: Fluke 8840A teardown and repair.  (Read 22393 times)

0 Members and 1 Guest are viewing this topic.

Offline KibiTopic starter

  • Supporter
  • ****
  • Posts: 385
  • Country: england
Fluke 8840A teardown and repair.
« on: June 19, 2012, 10:50:36 pm »
I guess this is more of a repair process than a full on teardown, but I did take the lid off, so anyway.
I got hold of a lovely Fluke 8840A off of Ebay a couple of weeks ago.
I received it in good time and upon powering it up it appears to work correctly and was as accurate as I could tell. The VFD was a bit dim, but I put this down to the age of the instrument.
Alas, after about an hour, it suddenly shut down. The outer casing was also unreasonably hot. Closer inspection revealed that the mains fuse was open, but also more importantly, it was four times the correct rating. The correct fuse for 240v operation is 0.125A.
I took it apart and referred to the circuit diagram included in the user manual (they just don't include that sort of thing in user manuals these days). The circuit diagram of the power supply section even states how many ohms to expect on each winding of the transformer. The transformer in this instrument measured close to shorted turns and most of the rest read a lot lower than stated.
So, having concluded that the transformer is dead, I contacted the seller who was willing to replace the unit and reimburse my return postage, which jolly kind of them.
However, after giving it much thought, I decided I wanted to keep this particular meter because it was fully loaded with the AC option board and the IEEE option board. I had also seen some smashed 8840A's going for a fair bit more than what I had paid for mine, so I decided that I'd be better off winding my own replacement transformer. The original transformer is fully encapsulated making it very difficult to re-wind.
I selected a toroid transformer with two secondaries of the correct voltage for some of the windings required and then I'd wind the rest of them myself. Toroid transformers are relatively easy to wind at home without any special tools.

Right, so, let's get set to work.

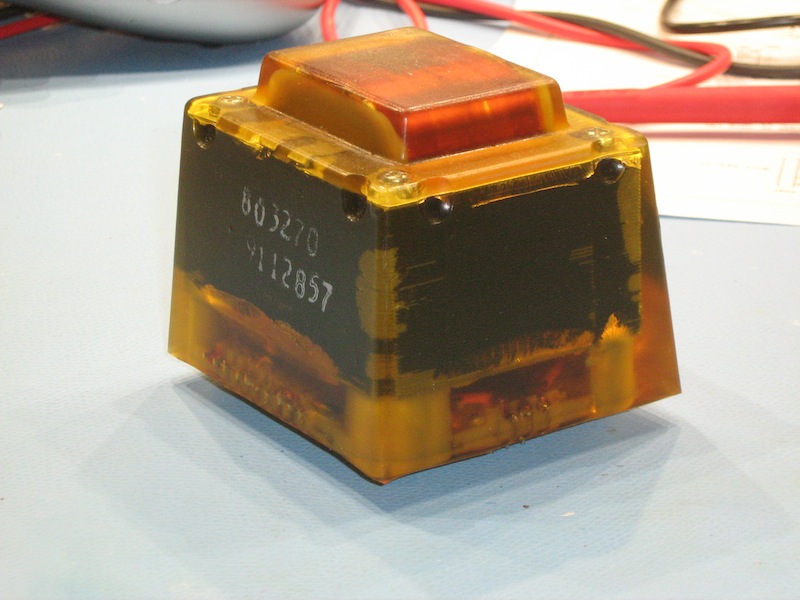
Here is the original transformer. I wouldn't fancy re-winding that. I can be done, but it's a proper mission.


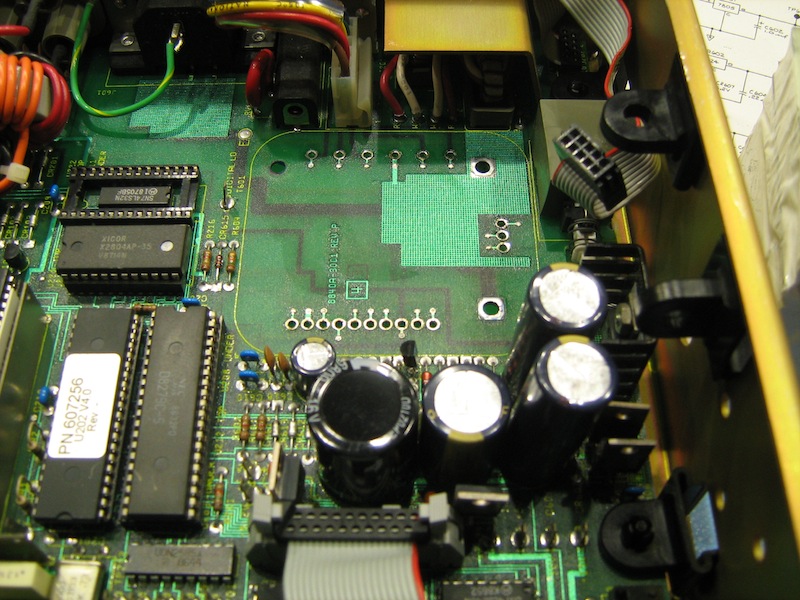
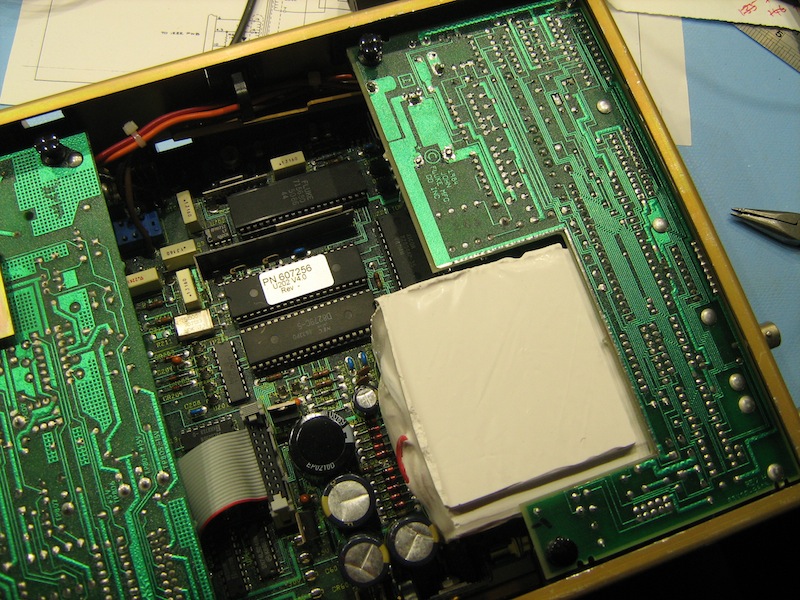
Here is the meter with the transformer removed. I also took the opportunity to re-cap it. There are only six electrolytics in the whole thing, so considering the age of the instrument and the recent extreme heat cycles it my have been subjected to, replacing these capacitors seemed sensible to me.


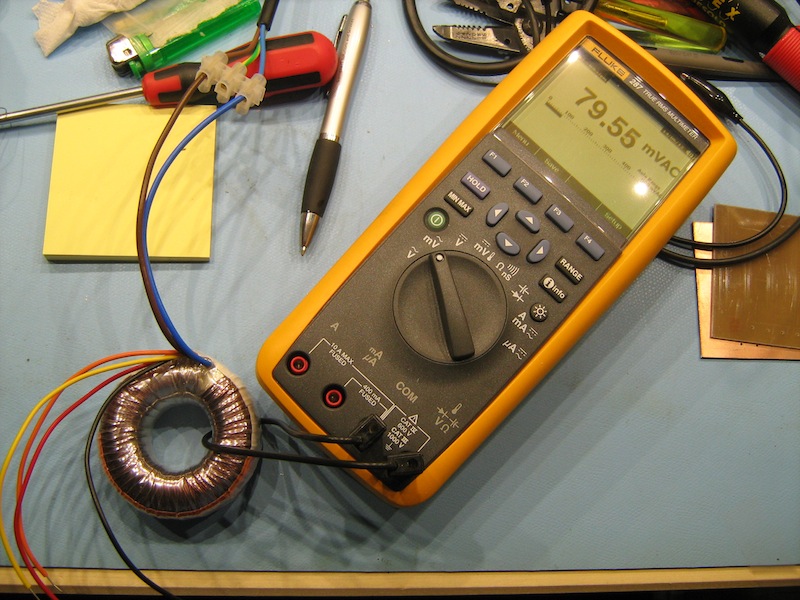
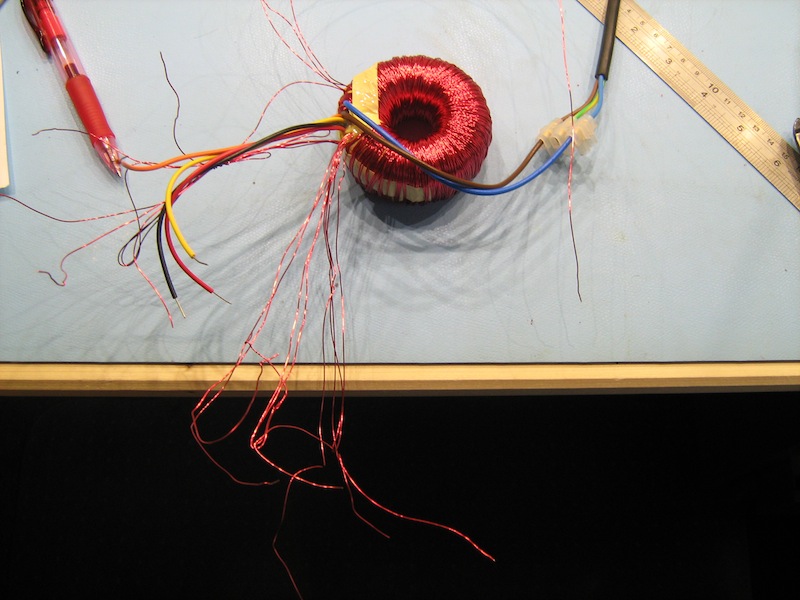
This is the toroid transformer that I got hold of. Here I am measuring the volts per turn so that I can calculate how many turns I need each of the additional secondary windings to be.


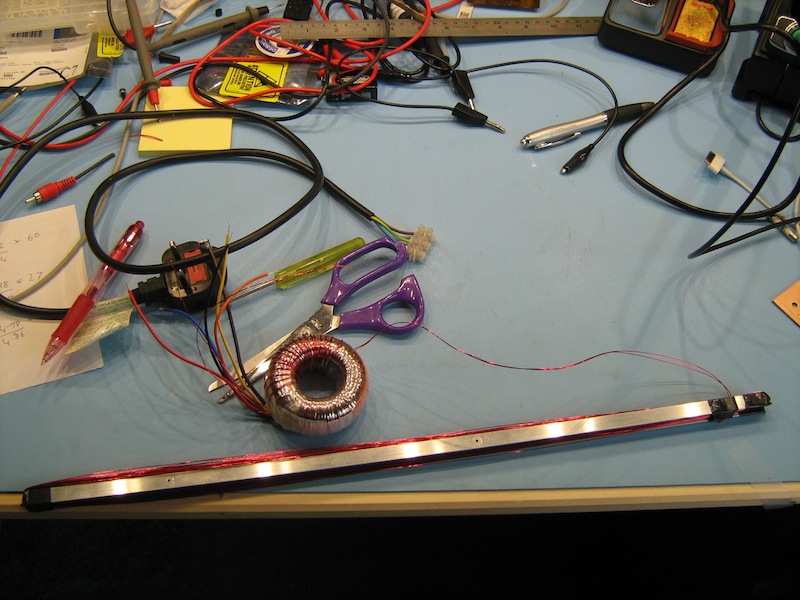
I have got some turns wound using my special stick with a measured length pair of secondaries wound up and down it. The stick threads the wire through the hole in the middle of the transformer rather like the shuttle on a weaving loom.


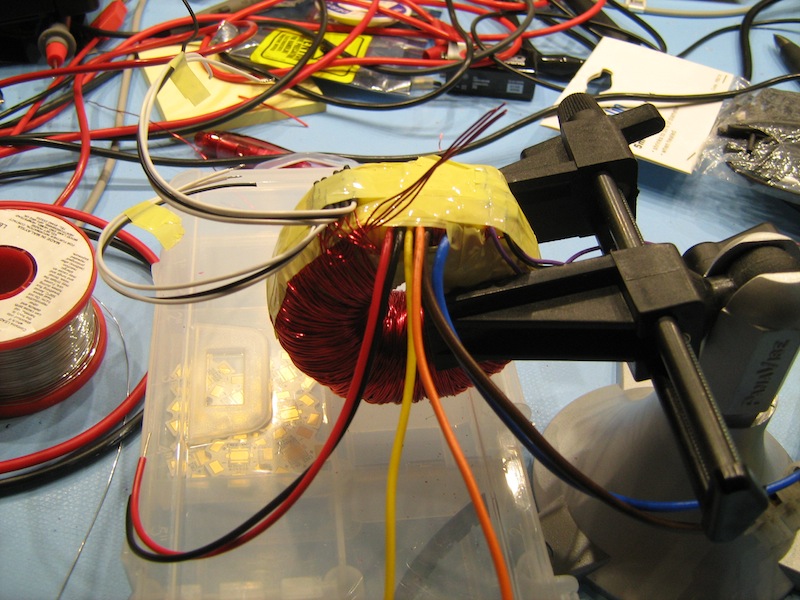
One pair of secondaries wound.


All of the secondaries wound and undergoing testing.


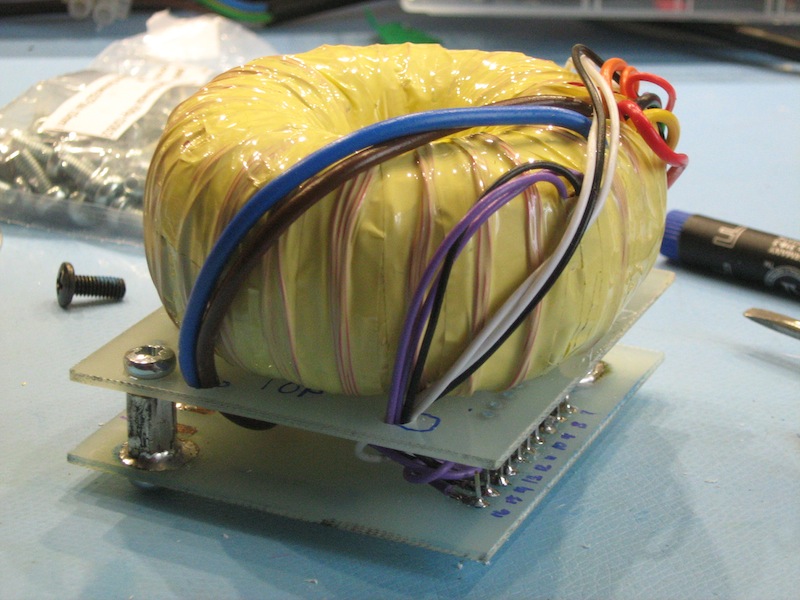
Now all of the additional windings need to be trimmed and terminated into flexible leads.


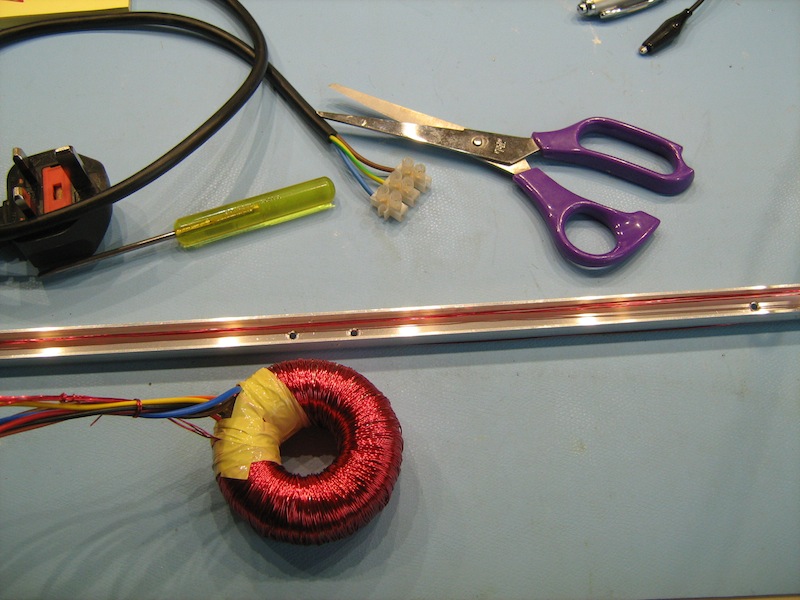
Then, it's all wrapped up in Polyester tape.


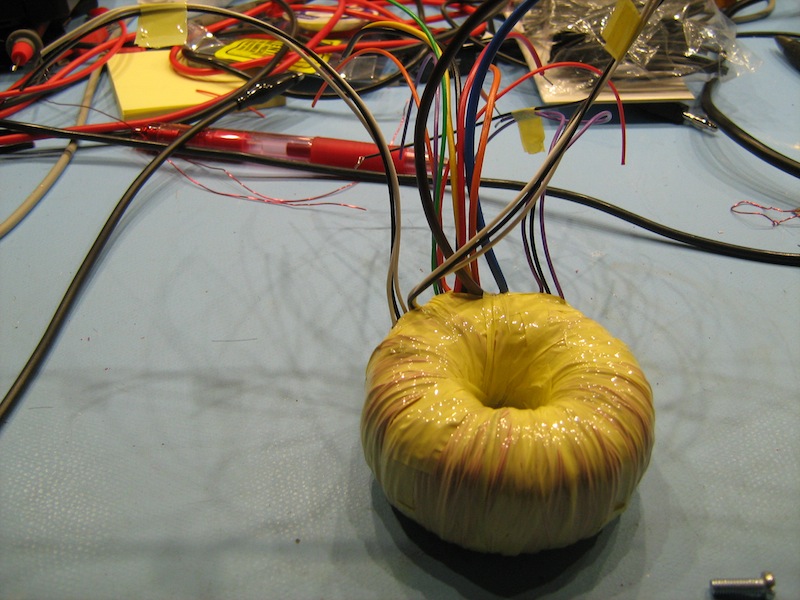
After a final test, all the secondaries are producing the correct voltages.
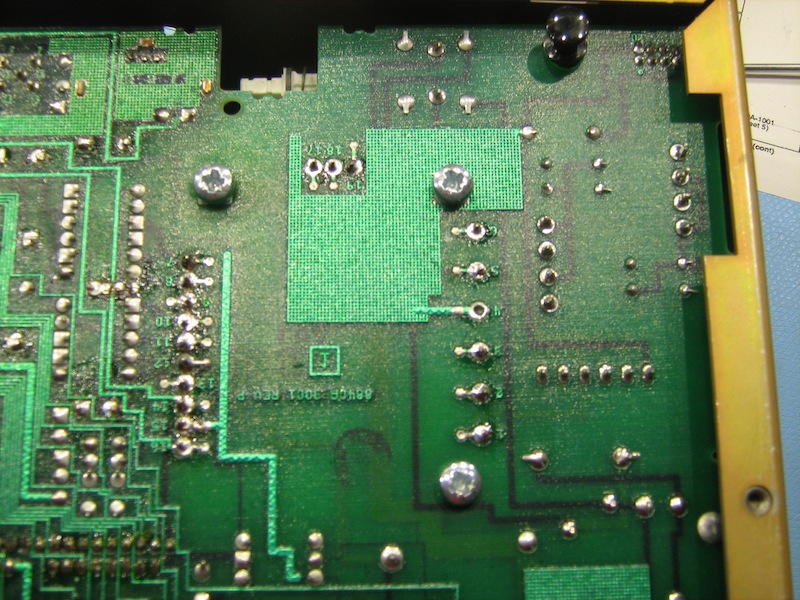
I then installed the new capacitors and soldered the transformer leads directly to the bottom of the PCB to test.


Looks good to me. Also a good opportunity to ensure that voltages on the various test points are within specification. Of course the allowable voltage tolerances on each of the test points is printed in the user manual.


OK cool, so it all works. However, the transformer needs to be mounted properly and I'm not even considering drilling or making any modifications to the original PCB.
I have taken two pieces of FR4 the same size. The upper one is for the new transformer to sit on and the bottom one will accommodate the pins and mounting bolt holes.
I have used M4 threaded stand offs for the screws that go through existing holes in the original main PCB to mount the whole assembly.
It's all constructed and ready to be encapsulated in thermally conductive epoxy.


This is the mould. I have used polythene bags to act as a release agent. Most epoxy resins will not adhere to polythene.


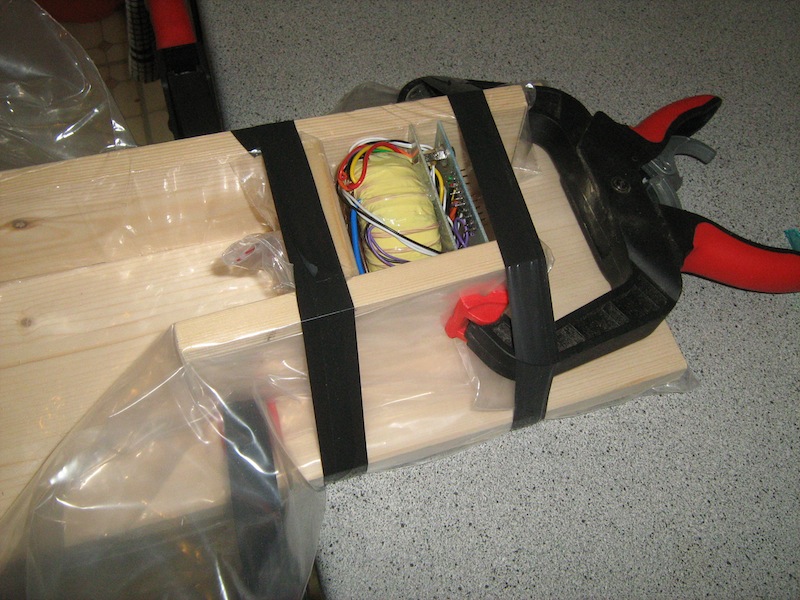
The epoxy is poured. Some is leaking out, but it's not a big deal. Also some wires have escaped encapsulation, but again, not a big deal.


Whilst the epoxy set over the following 24 hours, I installed the new capacitors.


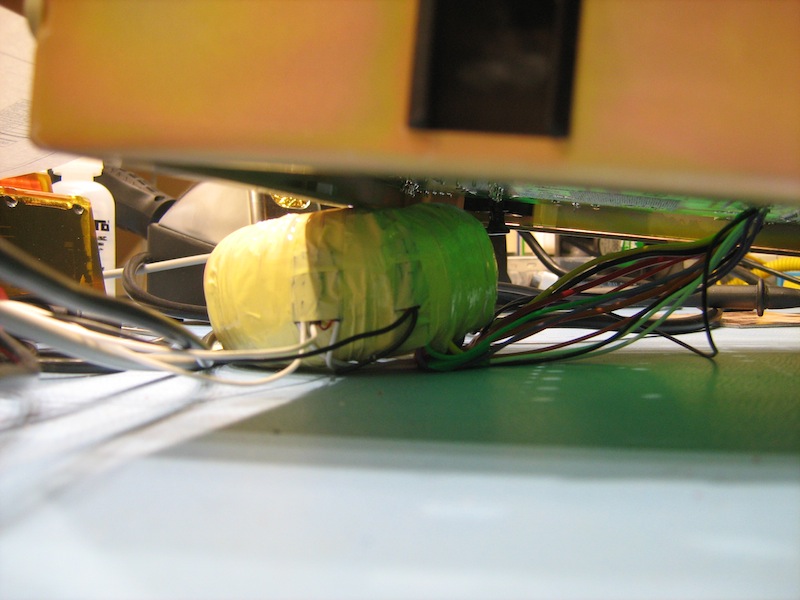
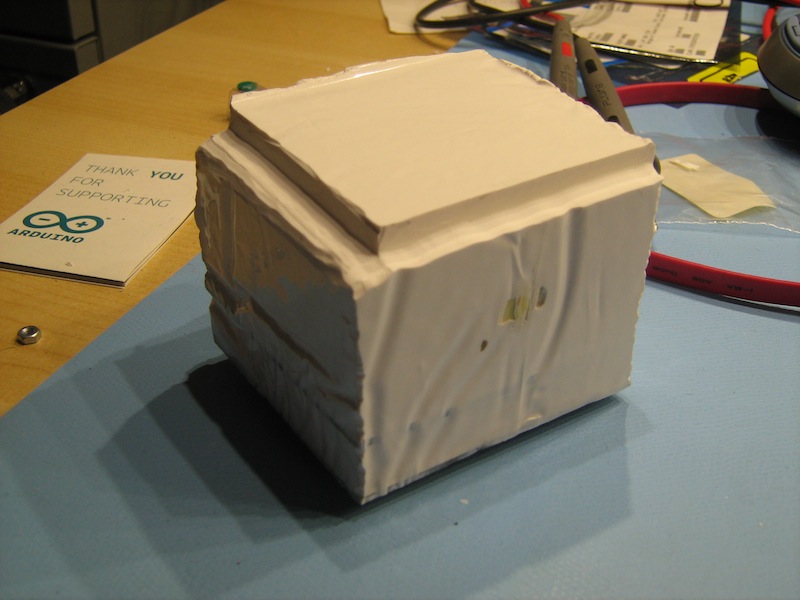
Finally, it's set and the mould released easily. It's a bit wrinkly from the polythene bags, no big deal. I didn't invest a great deal of time making sure the polythene was perfectly ironed out. Also the part of the transformer that is showing is because it was resting on the bottom of the mould.


Then a bit of shaping with the Dremel so that the IEEE board would fit.


All of the bolt holes and pins lined up nicely. Although M4 screws were ever so slightly large for the holes in the main PCB, I didn't have to drill or modify any part of it. I guess the original holes were to accommodate some weird American size screws. Well, it is an American instrument after all, actually made in America - which is nice.


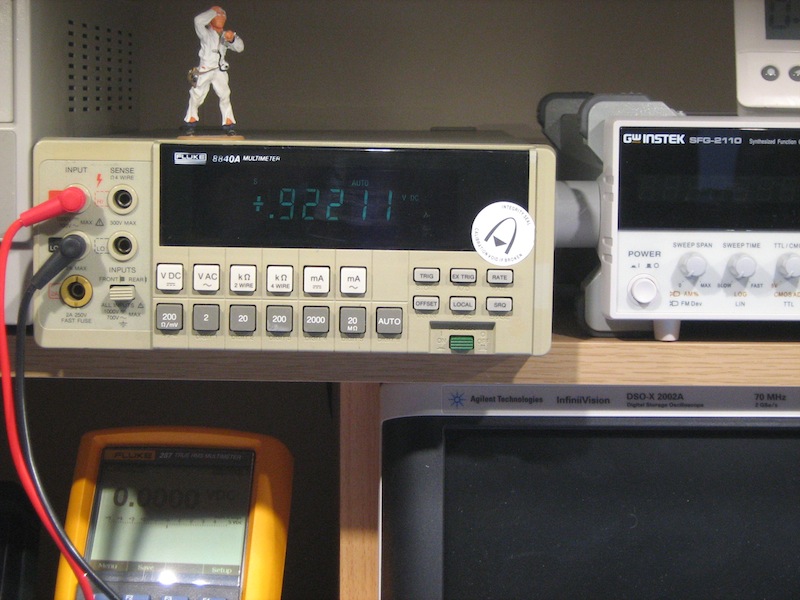
There it is all fully assembled...


...and working. The VFD is much brighter too. It's AC feed comes from it's own pair of windings on the transformer, now that these are producing the correct voltage, the VFD works properly. Very impressed :)


I wouldn't be surprised to see another 30 odd years of service from this instrument.
Although I'm happy with the resolution and the insane input impedance, I'd very much like to have it calibrated. Although full calibration instructions are detailed in the user manual, I don't have a reliable or known reference, so I guess I'd better start saving. :)
« Last Edit: February 07, 2021, 07:19:39 pm by Kibi »
 
The following users thanked this post: wasyoungonce, doktor pyta, feedback.loop

Offline david77

  • Frequent Contributor
  • **
  • Posts: 934
  • Country: de
Re: Fluke 8840A teardown and repair.
« Reply #1 on: June 19, 2012, 11:41:13 pm »
Great repair!
It's great to see what effort you put into keeping that meter on the road. I'm sure it'll give you years of good service.

Btw. have you found out why the old transformer got hot in the first place? It'd be a shame if the new one died as well.
Shorted caps maybe?
 

Offline krivx

  • Frequent Contributor
  • **
  • Posts: 765
  • Country: ie
Re: Fluke 8840A teardown and repair.
« Reply #2 on: June 19, 2012, 11:59:25 pm »
Amazing repair. I just love seeing the effort that goes into such a clean solution.
 

Offline zaoka

  • Frequent Contributor
  • **
  • Posts: 376
  • Country: us
Re: Fluke 8840A teardown and repair.
« Reply #3 on: June 20, 2012, 01:05:24 am »
Great repair!

What kind of epoxy is that?
 

Offline StubbornGreek

  • Frequent Contributor
  • **
  • Posts: 290
  • Country: us
Re: Fluke 8840A teardown and repair.
« Reply #4 on: June 20, 2012, 01:10:10 am »
I really enjoyed reading through this. Enjoy your "new" meter.
"The reward of a thing well done is to have it done"
-Ralph Waldo Emerson
 

Offline KibiTopic starter

  • Supporter
  • ****
  • Posts: 385
  • Country: england
Re: Fluke 8840A teardown and repair.
« Reply #5 on: June 20, 2012, 06:17:34 am »
 

Offline T4P

  • Super Contributor
  • ***
  • Posts: 3697
  • Country: sg
    • T4P
Re: Fluke 8840A teardown and repair.
« Reply #6 on: June 20, 2012, 06:34:53 am »
A quick'n'dirty job on the transformer but it came out as a lovely cake  :-[
I really really like the look of the potted transformer, good job kibi  ::)
 

Offline grumpydoc

  • Super Contributor
  • ***
  • Posts: 2905
  • Country: gb
Re: Fluke 8840A teardown and repair.
« Reply #7 on: June 20, 2012, 06:54:30 am »
What's the advantage to potting the transformer in the original?
 

Offline T4P

  • Super Contributor
  • ***
  • Posts: 3697
  • Country: sg
    • T4P
Re: Fluke 8840A teardown and repair.
« Reply #8 on: June 20, 2012, 07:31:09 am »
What's the advantage to potting the transformer in the original?

Stability, the same way Dave doesn't like free hanging to-220 devices
 

Offline KibiTopic starter

  • Supporter
  • ****
  • Posts: 385
  • Country: england
Re: Fluke 8840A teardown and repair.
« Reply #9 on: June 20, 2012, 06:24:43 pm »
Btw. have you found out why the old transformer got hot in the first place? It'd be a shame if the new one died as well.
Shorted caps maybe?

Ye, I've thought about it a bit. Not too sure really. The most likely explanation is that perhaps someone had the voltage selector switches set for the incorrect voltage which may have done some damage which just got worse over time.
The person who uprated the fuse didn't make things any better either.
The capacitors measured OK, ESR was OK too. I just replaced them anyway.
 

Offline M. András

  • Super Contributor
  • ***
  • Posts: 1014
  • Country: hu
Re: Fluke 8840A teardown and repair.
« Reply #10 on: June 20, 2012, 07:13:13 pm »
congrats for the meter. lets hope they new meters will last 30 years too.
 

Offline robrenz

  • Super Contributor
  • ***
  • Posts: 3035
  • Country: us
  • Real Machinist, Wannabe EE
Re: Fluke 8840A teardown and repair.
« Reply #11 on: June 20, 2012, 07:25:51 pm »
Very nice work!

Offline Mint.

  • Frequent Contributor
  • **
  • Posts: 523
  • Country: au
  • Account is inactive now. Thanks everybody!
    • Personal Blog, Mint Electronics.
Re: Fluke 8840A teardown and repair.
« Reply #12 on: June 20, 2012, 11:54:37 pm »
That's awesome! I don't think I would be able to do something such as making your own transformer, not to mention the tolerance and the ratings of the transformer. ;D
Personal Blog (Not Active Anymore), Mint Electronics:
http://mintelectronics.wordpress.com/
 

Offline KibiTopic starter

  • Supporter
  • ****
  • Posts: 385
  • Country: england
Re: Fluke 8840A teardown and repair.
« Reply #13 on: June 21, 2012, 05:59:42 pm »
That's awesome! I don't think I would be able to do something such as making your own transformer, not to mention the tolerance and the ratings of the transformer. ;D
It wasn't too difficult, mainly because the data was provided in the circuit diagrams.
I based the VA rating of the transformer (30VA)on the capacity of the fuse, so the transformer may actually be over rated, but that's OK. Toroidal transformers have that advantage of having good regultaion and are more compact.
As I stated in my OP, the number of turns requierd for each secondary was based on the voltage that one turn provided.
I admit, it was a lot of work, but not very difficult and well worth it in the end. :)
 

Offline SeanB

  • Super Contributor
  • ***
  • Posts: 16286
  • Country: za
Re: Fluke 8840A teardown and repair.
« Reply #14 on: June 21, 2012, 06:06:38 pm »
When I wasa doing my apprenticeship we made our own power supplies, including the making of the mains transformer from scratch, though we did get the EI laminations given to us. Most did work, though there were a few spectacular mushroom clouds...........
 

Offline david77

  • Frequent Contributor
  • **
  • Posts: 934
  • Country: de
Re: Fluke 8840A teardown and repair.
« Reply #15 on: June 21, 2012, 07:11:31 pm »
Hehe, yeah winding a transformer by hand is not the most fun job, I've done a couple. You sit there in a heap of thin wires winding and counting for hours trying to get smooth layers so that all the wire fits on the core and it doesn't hum later  ::).
And when your finished it turns out the thing hums like a hive of bees...lets not go into what I did to fix that  ;).
But the trannies still work >10 years later!
 

Offline SeanB

  • Super Contributor
  • ***
  • Posts: 16286
  • Country: za
Re: Fluke 8840A teardown and repair.
« Reply #16 on: June 21, 2012, 07:19:19 pm »
Did it involve a vacuum chamber and varnish?
 

Offline david77

  • Frequent Contributor
  • **
  • Posts: 934
  • Country: de
Re: Fluke 8840A teardown and repair.
« Reply #17 on: June 21, 2012, 08:04:18 pm »
You could call it a vacuum chamber, but I prefer to call it a big tin of varnish, a hoover and lots of duct tape ;).
It worked but I probably wouldn't do it again, today I have a feeling the combination of sparking motor and flamable fumes could turn nasty  :-\
« Last Edit: June 21, 2012, 08:10:01 pm by david77 »
 

Offline nukie

  • Frequent Contributor
  • **
  • Posts: 799
  • Country: au
Re: Fluke 8840A teardown and repair.
« Reply #18 on: June 22, 2012, 01:13:23 am »
For 30 years, you might want to refresh the memory chips. I don't remember how its done but you can look it up the net.

tapatalk
 

Offline SeanB

  • Super Contributor
  • ***
  • Posts: 16286
  • Country: za
Re: Fluke 8840A teardown and repair.
« Reply #19 on: June 22, 2012, 05:05:55 am »
Davis, that does sound familiar, though I dad use the vacuum cleaner as a temporary replacement for a vacuum pump that lunched itself one day, as I needed the pump to work, and the vacuum cleaner was just good enough. I knew I could get new motor assemblies for it at a price that was 10% of the original price from Columbus. Same motor and integrated fan assembly, just cheaper, and would last just as long.
 

Offline arhi

  • Contributor
  • Posts: 15
  • Country: 00
    • My Electronics Blog
Re: Fluke 8840A teardown and repair.
« Reply #20 on: July 01, 2012, 05:03:46 pm »
it was fully loaded with the AC option board and the IEEE option board.

I don't have AC (option 9) on mine 8840A and I kinda wanted to make one for fun.. I have the schematic (from the manual) but if you can take a picture of the both sides of the option 9 board and post them online it would make my life 100000 times easier :D

Offline chevybeef

  • Contributor
  • Posts: 23
  • Country: gb
Re: Fluke 8840A teardown and repair.
« Reply #21 on: July 07, 2020, 04:47:17 pm »
What do you think a working 8840A/AF would be worth today as I'm thinking of buying one?
 

Offline xwarp

  • Frequent Contributor
  • **
  • Posts: 367
  • Country: us
Re: Fluke 8840A teardown and repair.
« Reply #22 on: July 08, 2020, 10:18:36 pm »
I have a couple of those transformers from scrapped units. I like your method too!


Share me

Digg  Facebook  SlashDot  Delicious  Technorati  Twitter  Google  Yahoo
Smf