Fred Flintstone's Internet Connection Beware lots of pictures here!I am going to try to make this information as clear as possible to help anyone find information about this device. There is another, very old thread here about this subject but it was not very clear IMO.
What is it really All of these 60w digital soldering stations are made by a single company, Atten. The product is then rebranded for other stores/brand labels. Atten offers other watt ratings within this model line but the most common one that gets rebranded is the 60w.
The Design Details The iron uses a Hakko 900m tip. The iron itself (just the handle part) looks like a Hakko 936. It is NOT the same, and they are NOT interchangeable. Hakko uses a 5 wire heating element. The 5 wire PLUG is used on the Atten 60w. The Atten circuit only uses 3 connections inside this 5 wire plug. The Hakko 5 wire system has a heating element on 2 wires, a temperature sensing thermocouple element on 2 wires, and the earth ground wire in the center. The Atten unit uses the thermocouple in series with the heating element to determine temperature. This design has only 3 connections, two for the element and one for ground. The heating element dimensions are the same as the Hakko 936 (around 69-70mm from glass sleeve base to tip × 3.7mm main body). The iron's body and all it's respective parts and connections are compatible(the wiring is not).
The original unit I have from RadioShack has a resistance of 10.2ohms at room temperature. With Harbor Freight digital calipers the element's wire diameter is 0.62mm.
The cheap (<$5) 936 clone iron I have measures 13.7ohms at room temperature and uses a wire diameter of 0.32mm, on one set of connections, 0.0ohms on the second set of wires w/ the same diameter wire used.
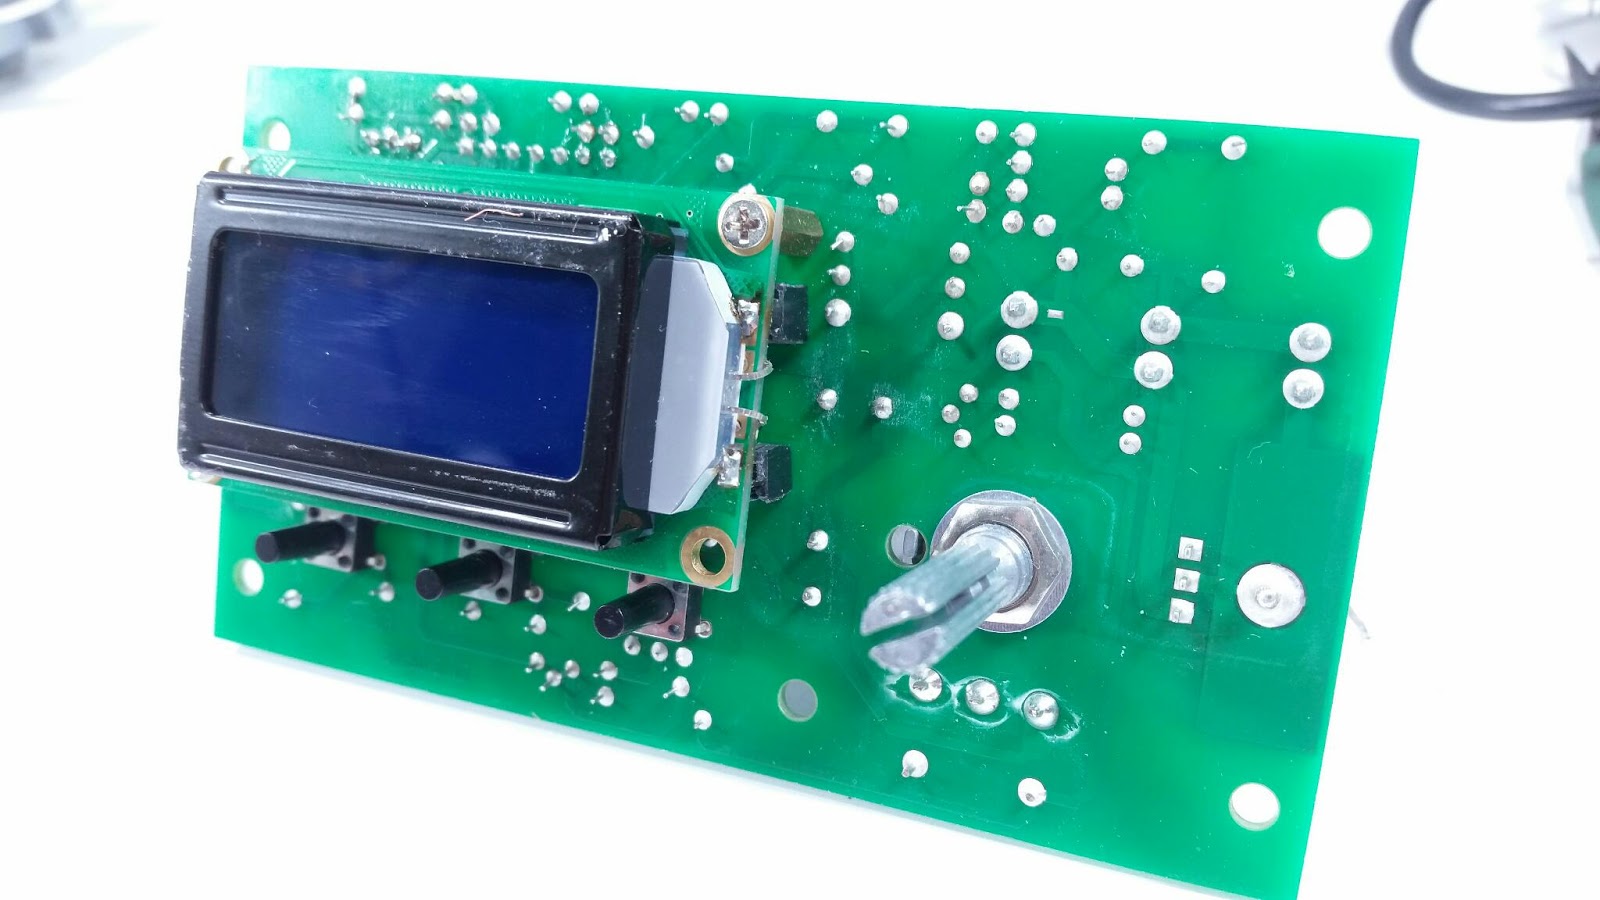
The temperature sensing is done by passing a signal through a LM324 op amp, that is connected to a PIC16F688 MCU. There is no programming header for the MCU but the DIP IC is socketed.
I have not reverse engineered this circuit, nor do I plan to.
However, a few interesting notes on the Hardware:
BC547×3 transistors
BT136 600E ×1 (on heatsink)
CJ 78L05 ×1 reg
CJ 79L05 ×1 reg negative
LM324N (Ti)
P102 ×1 (1k trim pot -adjusted/painted(LCD Backlight?)
P103 ×1 (10k trim pot -adjusted/painted)
1k Potentiometer ×1
2×8 LCD Hitachi Character Style
5 pin Aviation style plug
Banana terminal grounded to mains earth ground
Nicon 1000uF 25v KME ×1
Nicon 470uF 25v KME ×1
Nicon 10uF 16v KME ×2
Inline Threaded Fuse Holder w/500mA standard 20mm×5mm glass fuse (white secondary line/must disassemble to access)
Primary Mains Fuse Holder (on bottom) w/630mA standard 20mm×5mm glass fuse
Transformer Labelled:
Shenzhen Xiongying Electronic Factory
Model: XY-360030
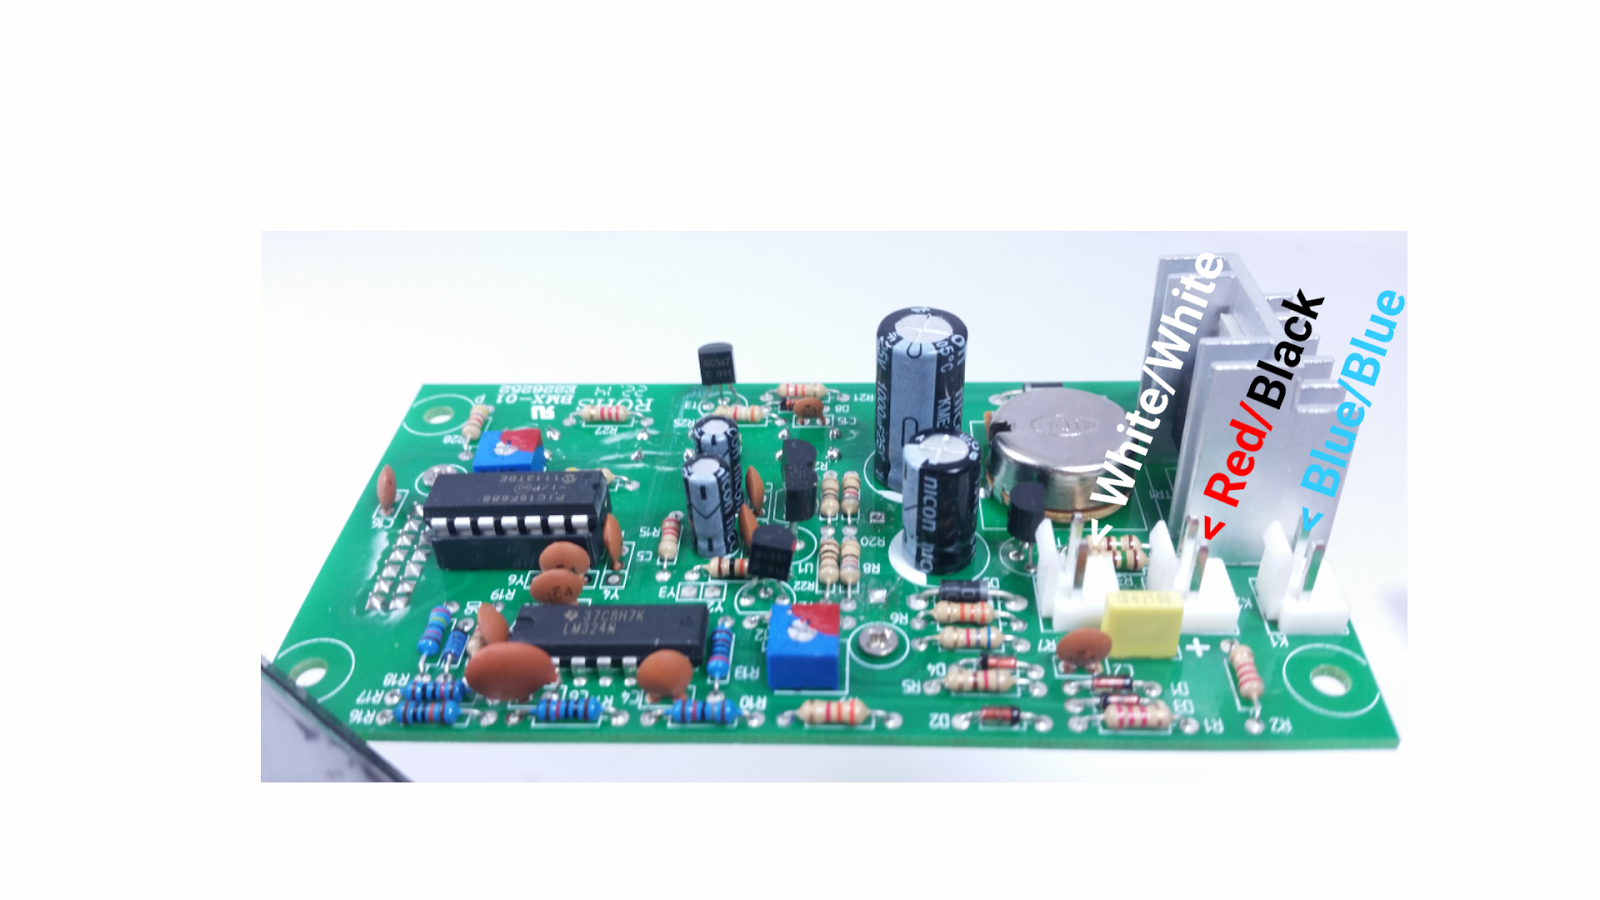
I/P: 120V AC 60Hz (red-red
(connecting wires))
O/P: 29V AC 1.92A (blue-blue)
9V AC 0.2A (white-white)
To open the unit, four screws hold the main enclosure together. Two are hidden under the rear pads. The wiring on the switch is mounted with the wider terminals down. The two lower/wider connectors connect to the two red wires with spade connectors (transformer primary side wires). The upper 2 terminals of the switch are connected to the white wire with spade connector (mains neutral), and the blue wire with spade connector (mains hot wire from primary fuse holder).
There are 3 identical 2 wire connectors on the PCB. The one closest to the center of the PCB is White/White, the middle is Red/Black, the outside connection is Blue/Blue.
The old Radio Shack part number for conical replacement tips for this unit is 64-2114.
The packaging was marked:
RadioShack Conical Soldering Tip 900M-T-LB
More details: Compatible with Hakko, medium 900M, 900M-ESD, 907, 907-ESD, 933 models