Author Topic: Digimess HY3020 teardown/review  (Read 20345 times)

0 Members and 1 Guest are viewing this topic.

Offline grumpydocTopic starter

  • Super Contributor
  • ***
  • Posts: 2905
  • Country: gb
Digimess HY3020 teardown/review
« on: February 10, 2013, 02:32:55 pm »
Thought I'd contribute to the new equipment forum with a teardown & review of the Digimess HY3020 bench PSU.


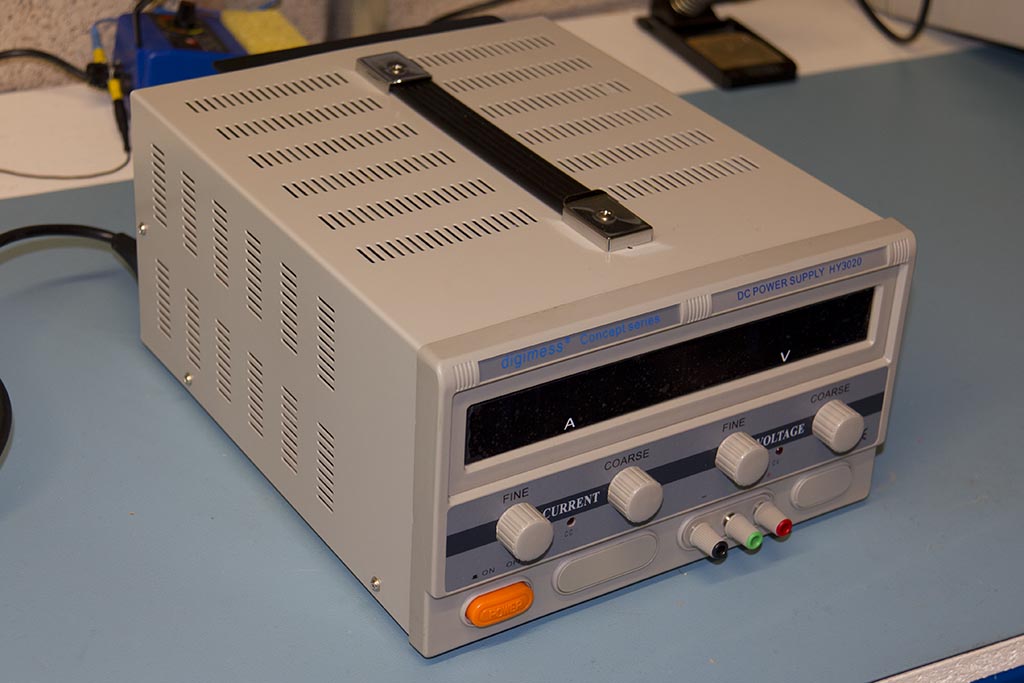
This is a pretty meaty PSU - 0-30V at up to 20A. It's a clone/re-badge of the Mastech HY3020 (but was Mastech the original or itself a clone? - there are so many of these PSUs badged by different manufacturers). The Digimess one is available from Farnell in the UK as well as Digimess themselves (and doubtless other distributors)

The design is a classic linear regulator, as can be seen in the Mastech schematic. The output consists of 7x2N3055, 6 main pass transistors with 0.36ohm ballasts and one to provide the base drive to the other 6. To keep power dissipation manageable at high current/low output voltage settings relays are used to switch in (or out) combinations of the transformer secondaries to vary the unregulated voltage.

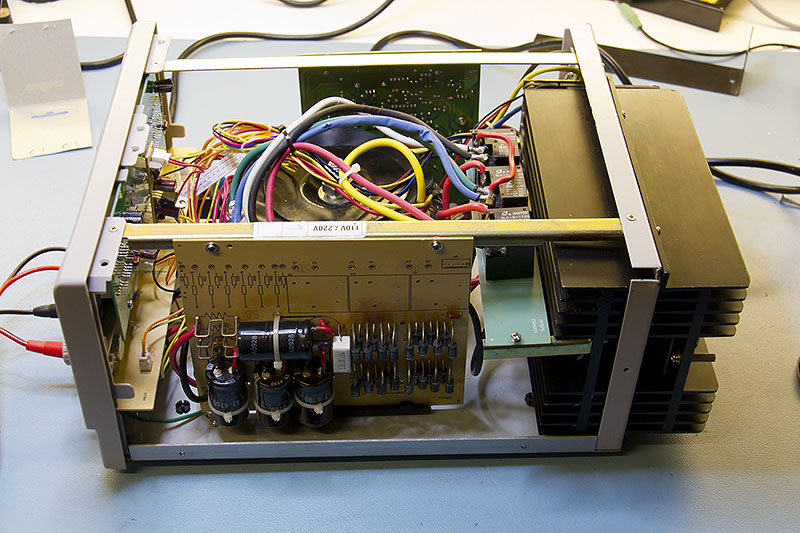
Construction is OK rather than anything else  as can be seen in the following shot - the case is fairly robust and the transformer and high current wiring certainly look the part! (click on pictures for large version).


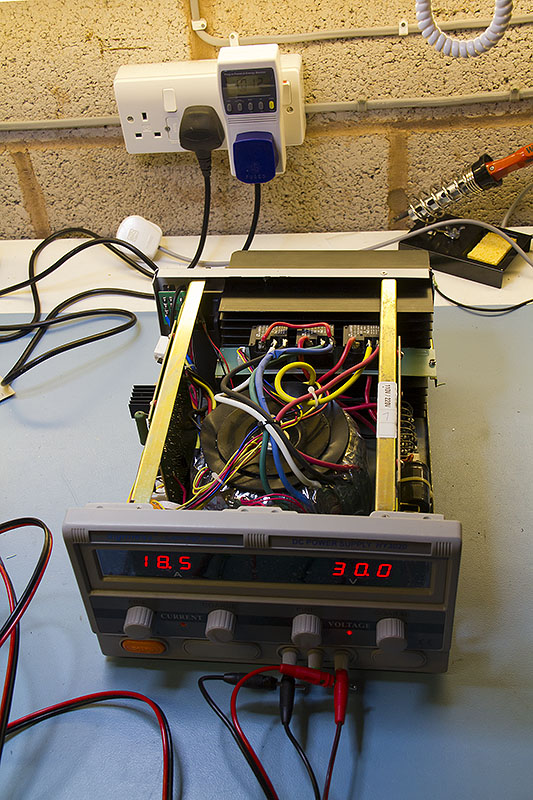
In the background you can just see the power meter reading 1012W in for 550W out so efficiency is about 54%, fairly typical for linear supplies.

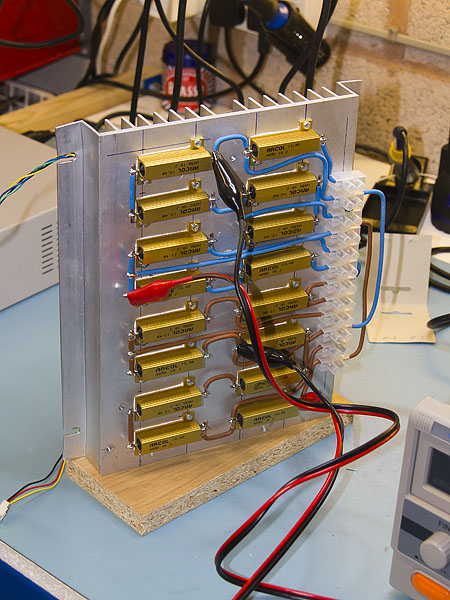
As an aside I needed to build a dummy load to test it as the full output runs to 600W - not quite as elegant as Dave's design but it gets the job done. Basically it's just 16 1 ohm 50W resistors in series with various taps to allow series/parallel combinations. At the moment it's wired as three 5ohm chains in parallel to give about 1.6ohms. With a couple of fans on the back of the heatsink it will do 600W, but it does get a bit warm!


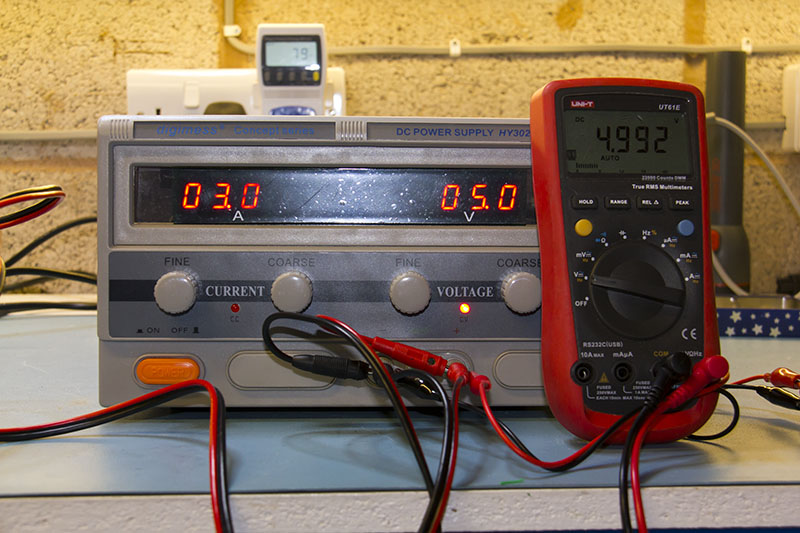
The voltmeter has been tweaked to correspond pretty closely with my UT61E, the current meter is a bit under 1% low. The eagle eyed may note that the PSU is now pulling 79W in for 15W out - now only 18% efficient


This shot shows the main bridge - 32 1N5408's and smoothing caps 4x4700uF @ 63V. Both, frankly a bit dubious. I know that the 1N5408 datasheet says they are resistant to thermal runaway but I'd rather have seen a single bridge rectifier with the appropriate rating and 63V rated caps are a bit too close to the transformers full output which is about 52V. You can see that the diodes run pretty warm as the PCB is starting to darken. The PCB is also somewhat obviously used for multiple variants.


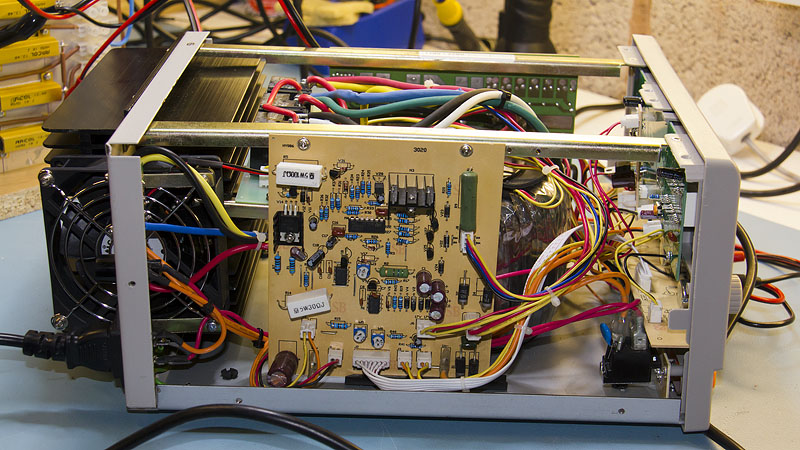
Shot from the other side showing the rest of the electronics. Both boards look fairly cheap (and it's extremely easy to lift tracks during repair). The fan placement is a bit odd as well, half in and half out of the case. The inner heatsink runs noticeably warmer than the outer as a result.


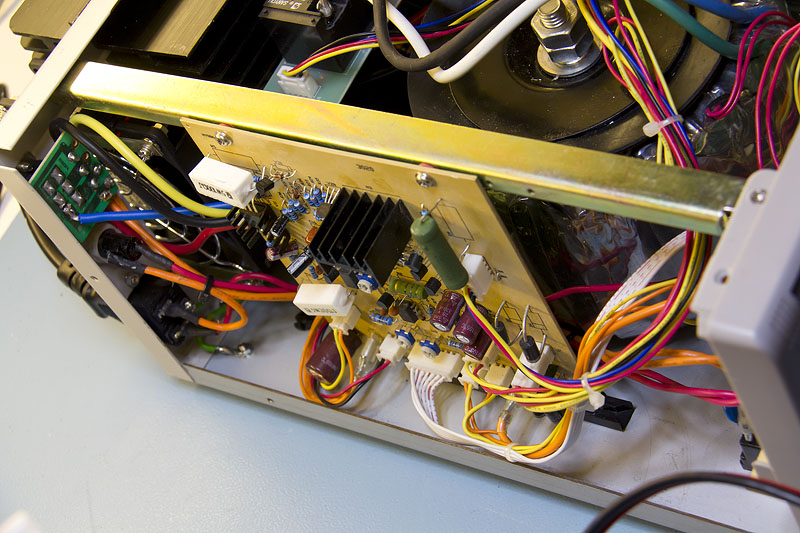
Looking down at the mains voltage selector shows that line voltage is present here so keep fingers away!


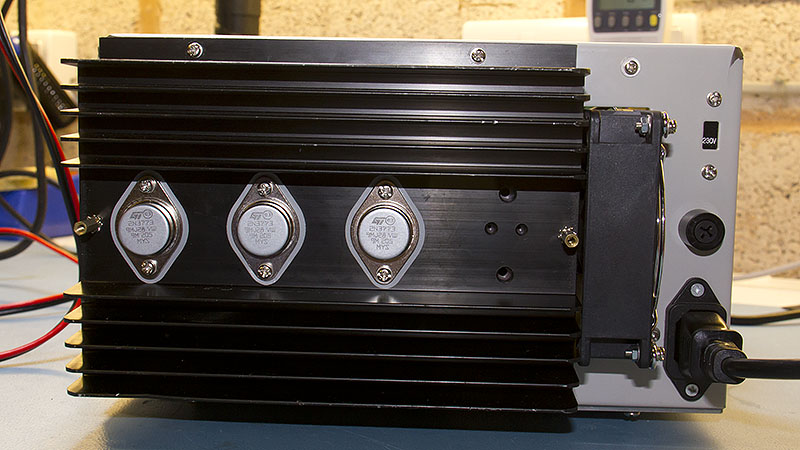
Three pass transistors are mounted on each of the heatsinks. Those with sharp vision might note that these are 2N3773's whereas I said 2N3055 above - see below.


Overall this is a competent PSU but I do have a couple of criticisms. An important missing feature is the lack of overvoltage protection. This particular one had died with 0V out - all the pass transistors were open circuit, probably because the fan had failed, however I've had a few where the failure is a shorted pass transistor and they then put out a fixed 52-56V. The fan also runs continuously, there's no temperature control and it's a bit loud.

It also suffers from the problem that all of these designs have which is the only way to set the current limit is to short the output. Also, although not too bad on this one as it has "coarse" and "fine" adjustments it can be quite hard to set the output voltage and current with any precision.

Another problem is that the thermal design is not really up to full output. The peak voltage across the pass transistors is about 26V so at 20A output each is dissipating 87W. The main heatsinks are probably managing 0.1-0.15oC/W - certainly the outer (and cooler) one was at about 40-50oC when pulling 20A at 15oC ambient and sitting on 0.45oC/W insulators the TO3 cases are going to be at 40oC above that. Add the 2N3055 junction-to-case thermal resistance of 1.5oC/W and the junctions are going to be at 210oC even on a cool day.

After a bit of perusing transistor data sheets (and availability/price) I swapped the output transistors for 2N3773's. These have a better junction-to-case thermal resistance of 1.17oC/W so the junctions should be 30oC cooler which at least brings them under their maximum rating and allows a bit of leeway for summer. The last time I posted about these someone suggested the MJ15015 which would have been even better but I found the 3773's at just over a quid each and the MJ's were about £3, I decided the extra margin wasn't worth the cost.

I'll try to get some voltage curves and ripple measurements from it in the next day or two and add them to the review.
 

Offline mariush

  • Super Contributor
  • ***
  • Posts: 5013
  • Country: ro
  • .
Re: Digimess HY3020 teardown/review
« Reply #1 on: February 10, 2013, 08:45:08 pm »
If you say the inside heatsink is hotter, why didn't you move one of the pass transistors to the outside on that spare location?

32 diodes to rectify the voltage ... why on earth do they have to be so cheap? A 50A bridge rectifier is under $3 and can be much more easily heatsinked...
 

Offline grumpydocTopic starter

  • Super Contributor
  • ***
  • Posts: 2905
  • Country: gb
Re: Digimess HY3020 teardown/review
« Reply #2 on: February 10, 2013, 09:30:23 pm »
Quote
If you say the inside heatsink is hotter, why didn't you move one of the pass transistors to the outside on that spare location?

If you remember I mentioned that there is a 2N3055 wired to provide base current to the main pass transistors (see the circuit diagram). This transistor is mounted on the inside heatsink so the PCB traces for it aren't paralleled with the others. The same PCB is used for the three pass transistors mounted on the outside heatsink so the "spare" location actually corresponds to the base driver. I actually considered adding a pass transistor to this location. Although the total dissipation would remain the same the power dissipated by each transistor would drop from 87W to 74.5W which, given the 2oC/W junction-to-heatsink thermal resistance would drop the junction temperature by 26oC (for the 2N3055) but decided it would need too much hacking with the PCB.
 

Offline grumpydocTopic starter

  • Super Contributor
  • ***
  • Posts: 2905
  • Country: gb
Re: Digimess HY3020 teardown/review
« Reply #3 on: February 10, 2013, 09:48:47 pm »
A few screen dumps from some dynamic testing.

Turn-on behaviour - first trace at 12V, 7.5A load, and 2nd with no load. Pretty well controlled with no appreciable overshoot but a rather pedestrian build up to full voltage.


Turn off behaviour. Again at 12V with a 7.5A load, then with no load. Those weedy smoothing caps can't provide 7.5A for very long but well controlled with no loss of regulation, even when there's no load and it takes half a second for the output voltage to collapse.


Noise  & ripple, again at 12V, 7.5A output - basically no ripple and about 20mV noise pk-pk, probably looks worse than reality given this was obtained with crappy BNC to croc clip lead. I had hoped to set up a low impedance x10 probe to do the measurement but the 50ohm termination is DC coupled only so I just flipped it to AC coupled 1meg. The 'scope has calculated 0.94mV rms which is actually  in spec (which is 1mV rms noise+ripple).


« Last Edit: February 11, 2013, 08:10:19 am by grumpydoc »
 

Offline mariush

  • Super Contributor
  • ***
  • Posts: 5013
  • Country: ro
  • .
Re: Digimess HY3020 teardown/review
« Reply #4 on: February 10, 2013, 09:54:04 pm »
Ah, I see, thanks for clarifying. 

I assumed those transistors are simply free standing, with wires soldered to them which go to a pcb, like the Tenma I have talked about and posted pictures of here

But now that i think about it, the wires would probably desolder themselves from the leads at such temperatures you mentioned.

Wouldn't there be an issue with that part of the heatsink (where there's empty space) being colder than the other side, especially when you have the fan positioned on that side?  Just a guess, but it looks like the transistor at the far left has less heatsink area to dissipate its heat, and the fan may not even pull enough air to get airflow over  that end.
Maybe if you put some aluminum/copper foil over the fins to make a sort of tunnel effect would improve things?
 

Offline grumpydocTopic starter

  • Super Contributor
  • ***
  • Posts: 2905
  • Country: gb
Re: Digimess HY3020 teardown/review
« Reply #5 on: February 10, 2013, 10:10:39 pm »
Quote
But now that i think about it, the wires would probably desolder themselves from the leads at such temperatures you mentioned.
Fortunately things don't get quite that hot - case temps are perhaps up to 80 or 90oC, too hot really - I'd prefer to keep it below 60oC - but actually within what the 2N3773 can handle.

Quote
Maybe if you put some aluminum/copper foil over the fins to make a sort of tunnel effect would improve things?

If you look closely there are two brass posts attached to the heat-sink - a cover mounts on those which has the effect you describe. It also keeps fingers away from the transistors themselves which is probably wise as the transistors could be rather hot.

Quote
Just a guess, but it looks like the transistor at the far left has less heatsink area to dissipate its heat, and the fan may not even pull enough air to get airflow over  that end.

Ah, you have caught my little faux-pas - the heatsink as pictured is upside down. I didn't intend to mount it that way but it's a major pain in the arse to remove the heatsink and replace it because the holes in the two heatsinks and the case are quite hard to line up. In any event it also means that a couple of scratches on the top of the heatsink are less visible as they are now on the bottom.

The far left transistor seems to be OK temperature wise so I'm going to leave it that way.
 

Offline Spawn

  • Frequent Contributor
  • **
  • Posts: 528
  • Country: nl
  • ³²µ º'ºººº³²
Re: Digimess HY3020 teardown/review
« Reply #6 on: February 10, 2013, 10:59:54 pm »
That’s nice noise and ripple measurement there, I got a 10A Yihua PSU  you can see half cut sine waves in there, pp was almost 9mv.
Quote

How is the fan noise? I avoid using the Yihua because of the noise, since I got couple more PSU’s and I am lazy to replace the fan.
« Last Edit: February 10, 2013, 11:04:34 pm by Spawn »
 

Offline grumpydocTopic starter

  • Super Contributor
  • ***
  • Posts: 2905
  • Country: gb
Re: Digimess HY3020 teardown/review
« Reply #7 on: February 11, 2013, 08:57:28 pm »
Quote
How is the fan noise?

Not quiet :)

However I tend to have a fan heater, dehumidifier and fans on various other bits of equipment going most of the time I'm working so it's not so obtrusive amongst that lot!
 

Offline Spawn

  • Frequent Contributor
  • **
  • Posts: 528
  • Country: nl
  • ³²µ º'ºººº³²
Re: Digimess HY3020 teardown/review
« Reply #8 on: February 11, 2013, 10:32:17 pm »
Thanks, nice to read you can work with that sound :)
I do some testing with car lights and building circuits, till 120W it is going well but sometimes I need to test little higher wattage so a 20A one would be nice to have, thanks for the review, I will keep eye on one.  :-+
 

Offline smile

  • Regular Contributor
  • *
  • Posts: 215
Re: Digimess HY3020 teardown/review
« Reply #9 on: December 27, 2016, 05:04:19 am »
This PSU goes for 320Eur, after reading I think I'll pass.

20A current is very nice, but it certainly is doubtful with those overheating diodes and such.
 

Offline drewyboy

  • Newbie
  • Posts: 1
  • Country: us
Re: Digimess HY3020 teardown/review
« Reply #10 on: December 28, 2016, 09:30:52 pm »
I got a guy an hour 15 minutes away from that's selling one for $50. Worth it? A renter left it at one his rental properties and he has no idea if it works, no power cord.
 

Offline mariush

  • Super Contributor
  • ***
  • Posts: 5013
  • Country: ro
  • .
Re: Digimess HY3020 teardown/review
« Reply #11 on: December 28, 2016, 11:59:17 pm »
It can be easily fixed if it's broken and the transformer is worth the money if you're into linear power supply. It could be the base of a better linear power supply, if you're interested in designing one.

I'd say yes, I'd get it for 50 dollars..
 

Offline Efoel

  • Newbie
  • Posts: 1
Re: Digimess HY3020 teardown/review
« Reply #12 on: September 30, 2017, 01:50:08 am »
Excuse me sir, I want to ask what is the voltage of the transformer used for this type of power supply, if it can be more specific every pin, thanks in advance.
 

Offline JacquesBBB

  • Frequent Contributor
  • **
  • Posts: 829
  • Country: fr
Re: Digimess HY3020 teardown/review
« Reply #13 on: January 15, 2018, 08:26:49 pm »
Quote from: grumpydoc
Overall this is a competent PSU but I do have a couple of criticisms. An important missing feature is the lack of overvoltage protection. This particular one had died with 0V out - all the pass transistors were open circuit, probably because the fan had failed, however I've had a few where the failure is a shorted pass transistor and they then put out a fixed 52-56V. The fan also runs continuously, there's no temperature control and it's a bit loud.

Thanks for this review.  I had spend quite some time trying to repair an equivalent one (SL-1730SL20A), although with a different transformer,  which should not change much.
https://www.eevblog.com/forum/repair/repairing-sl-1730sl20a-power-supply-what-is-this-component/msg1226148/#msg1226148
But up to now, I have failed to find the source of the trouble.

I have  quite some experience with the lower power  models ( 30V 3A)  which use  nearly the same control board.
Indeed, I have repaired more than a dozen of them. The failure was never the power transistors 2N3055.

This is why I did not check much these transistors in the present unit. I should say, that I got the unit in the trash, and it was not complete.
Now I realize that the fan was missing, and  the thermic sensor was controlling the fan. I thought it was something more subtle,
but when I read your post,  I realised that if I have  zero output,  after checking so many things, most probably as for you, the
power  transistors were damaged.
I checked this morning rapidly ( lack of time  during the week), and bingo, this was it. So thanks for the hint.
I  have not checked all, but will have most probably to replace them all.

Now I need also to put back a fan.  Can you tell me what are the characteristics of the fan  that is in your unit ?


Offline grumpydocTopic starter

  • Super Contributor
  • ***
  • Posts: 2905
  • Country: gb
Re: Digimess HY3020 teardown/review
« Reply #14 on: January 15, 2018, 09:58:24 pm »
Now I need also to put back a fan.  Can you tell me what are the characteristics of the fan  that is in your unit ?
Loud.

I have a couple in the to-fix pile, I'll have a look for the exact details but it will be later this week.
 

Offline JacquesBBB

  • Frequent Contributor
  • **
  • Posts: 829
  • Country: fr
Re: Digimess HY3020 teardown/review
« Reply #15 on: January 16, 2018, 07:00:36 pm »
Now I need also to put back a fan.  Can you tell me what are the characteristics of the fan  that is in your unit ?
Loud.

The 2N3773 you used is  a 16A  transistor. Do you think that a 30A transistor as the MJ802G or 2N5302G  can reduce  further the
heating of the  heatsink, and thus the fan noise ?

Quote
I have a couple in the to-fix pile, I'll have a look for the exact details but it will be later this week.

Thanks, I will not touch it anyway before this week-end. 

In a first time I will probably replace  all 2N3055 by the same, as I have a bunch of them,  and eventually look after, depending on my real use of the unit, of a possible replacement by  transistors of better performances.
 

Offline grumpydocTopic starter

  • Super Contributor
  • ***
  • Posts: 2905
  • Country: gb
Re: Digimess HY3020 teardown/review
« Reply #16 on: January 16, 2018, 10:13:46 pm »
The 2N3773 you used is  a 16A  transistor. Do you think that a 30A transistor as the MJ802G or 2N5302G  can reduce  further the
heating of the  heatsink, and thus the fan noise ?
Replacing the 2N3055's with a higher power transistor will not do anything for the heatsink temperature.

However higher power transistors have lower junction to case thermal resistance which means the transistor junctions will be cooler, they will also have bigger die areas, and heavier internal construction so are more robust generally. MJ802G looks reasonable.

Apart from changing the transistors I tend to put a 50V MOV across the output and a reverse biased diode across the pass transistors to provide a bit extra protection.
 

Offline JacquesBBB

  • Frequent Contributor
  • **
  • Posts: 829
  • Country: fr
Re: Digimess HY3020 teardown/review
« Reply #17 on: January 20, 2018, 11:51:19 am »
Hi have now removed all 2N3055 of my power supply.
I have many 2N3055 in my drawers,  coming from various sources, so before searching for better choice, I will first just replace with the same.  But what is exactly the same.

Most of my   2N3055 are from old stock from a lab, so probably of  reputable source, even if some are not marked with any brand.
But I also bought 5 on ebay  two years ago, most probably fake.

To check more clearly,  I open a bunch of them in the picture below using a heavy duty vice ( not elegant, but very quick ).

In the first row are the original 2N3055 from my 1730SL20A PSU ( equivalent to HY3020). 5 are open, 1 close to see the back.
The open one on the right is the only one that had survived.
Most of the breakdown were in the dye, and only one (left) at the connection of the wire.  The dye look quite small.

On the bottom row are :
On the right the ebay one (top : open , bottom , back)
On the left  an old stock one (top : open , bottom , back)


In all cases,  the wires are somewhat equivalent, but the dye is much larger in the OS  than in the other ones.

The dye is slightly larger on the ebay vs the original ( 2.6 mm vs 2.4 mm ) , but 4mm for OS.

In the original, there is an additional heatsink.  Double heatsink in the OS.

My Conclusion : The ebay is fake, but most probably, the 2N3055 in the   1730SL20A  are also fake, and not from ST, as branded.
So Even replacing the initial 2N3055  by real ones would be an improvement.

What do you think ?
 

Offline JacquesBBB

  • Frequent Contributor
  • **
  • Posts: 829
  • Country: fr
Re: Digimess HY3020 teardown/review
« Reply #18 on: January 20, 2018, 07:14:16 pm »
I have now replaced all 2N3055  and everything is working, although I  could only test    it up to 30V/3A  so far.


The only that is missing is the fan, which was missing in the unit I got in the trash.  If someone can show me the specifications of the fan and how it is attached  to the
enclosure, I would be grateful.

« Last Edit: January 20, 2018, 07:16:36 pm by JacquesBBB »
 

Offline chrisydan

  • Newbie
  • Posts: 1
  • Country: ve
Re: Digimess HY3020 teardown/review
« Reply #19 on: September 19, 2020, 06:07:03 pm »
saludos desde Venezuela, actualmente trabajo en la construcción y mejora de este modelo, de casualidad tendrás
 los valores de los secundarios del transformador?


Share me

Digg  Facebook  SlashDot  Delicious  Technorati  Twitter  Google  Yahoo
Smf