As I understand one of the U800 threaded studs is at +5V potential and the other is at ground, so joining both with a piece of aluminum will in essence create a short circuit. Again, I am up for being corrected if this is not correct, but I think I am not wrong.
Nope, those two studs are connected to -5 Volt (negative 5 volt). Or connected to U800 pin 19.
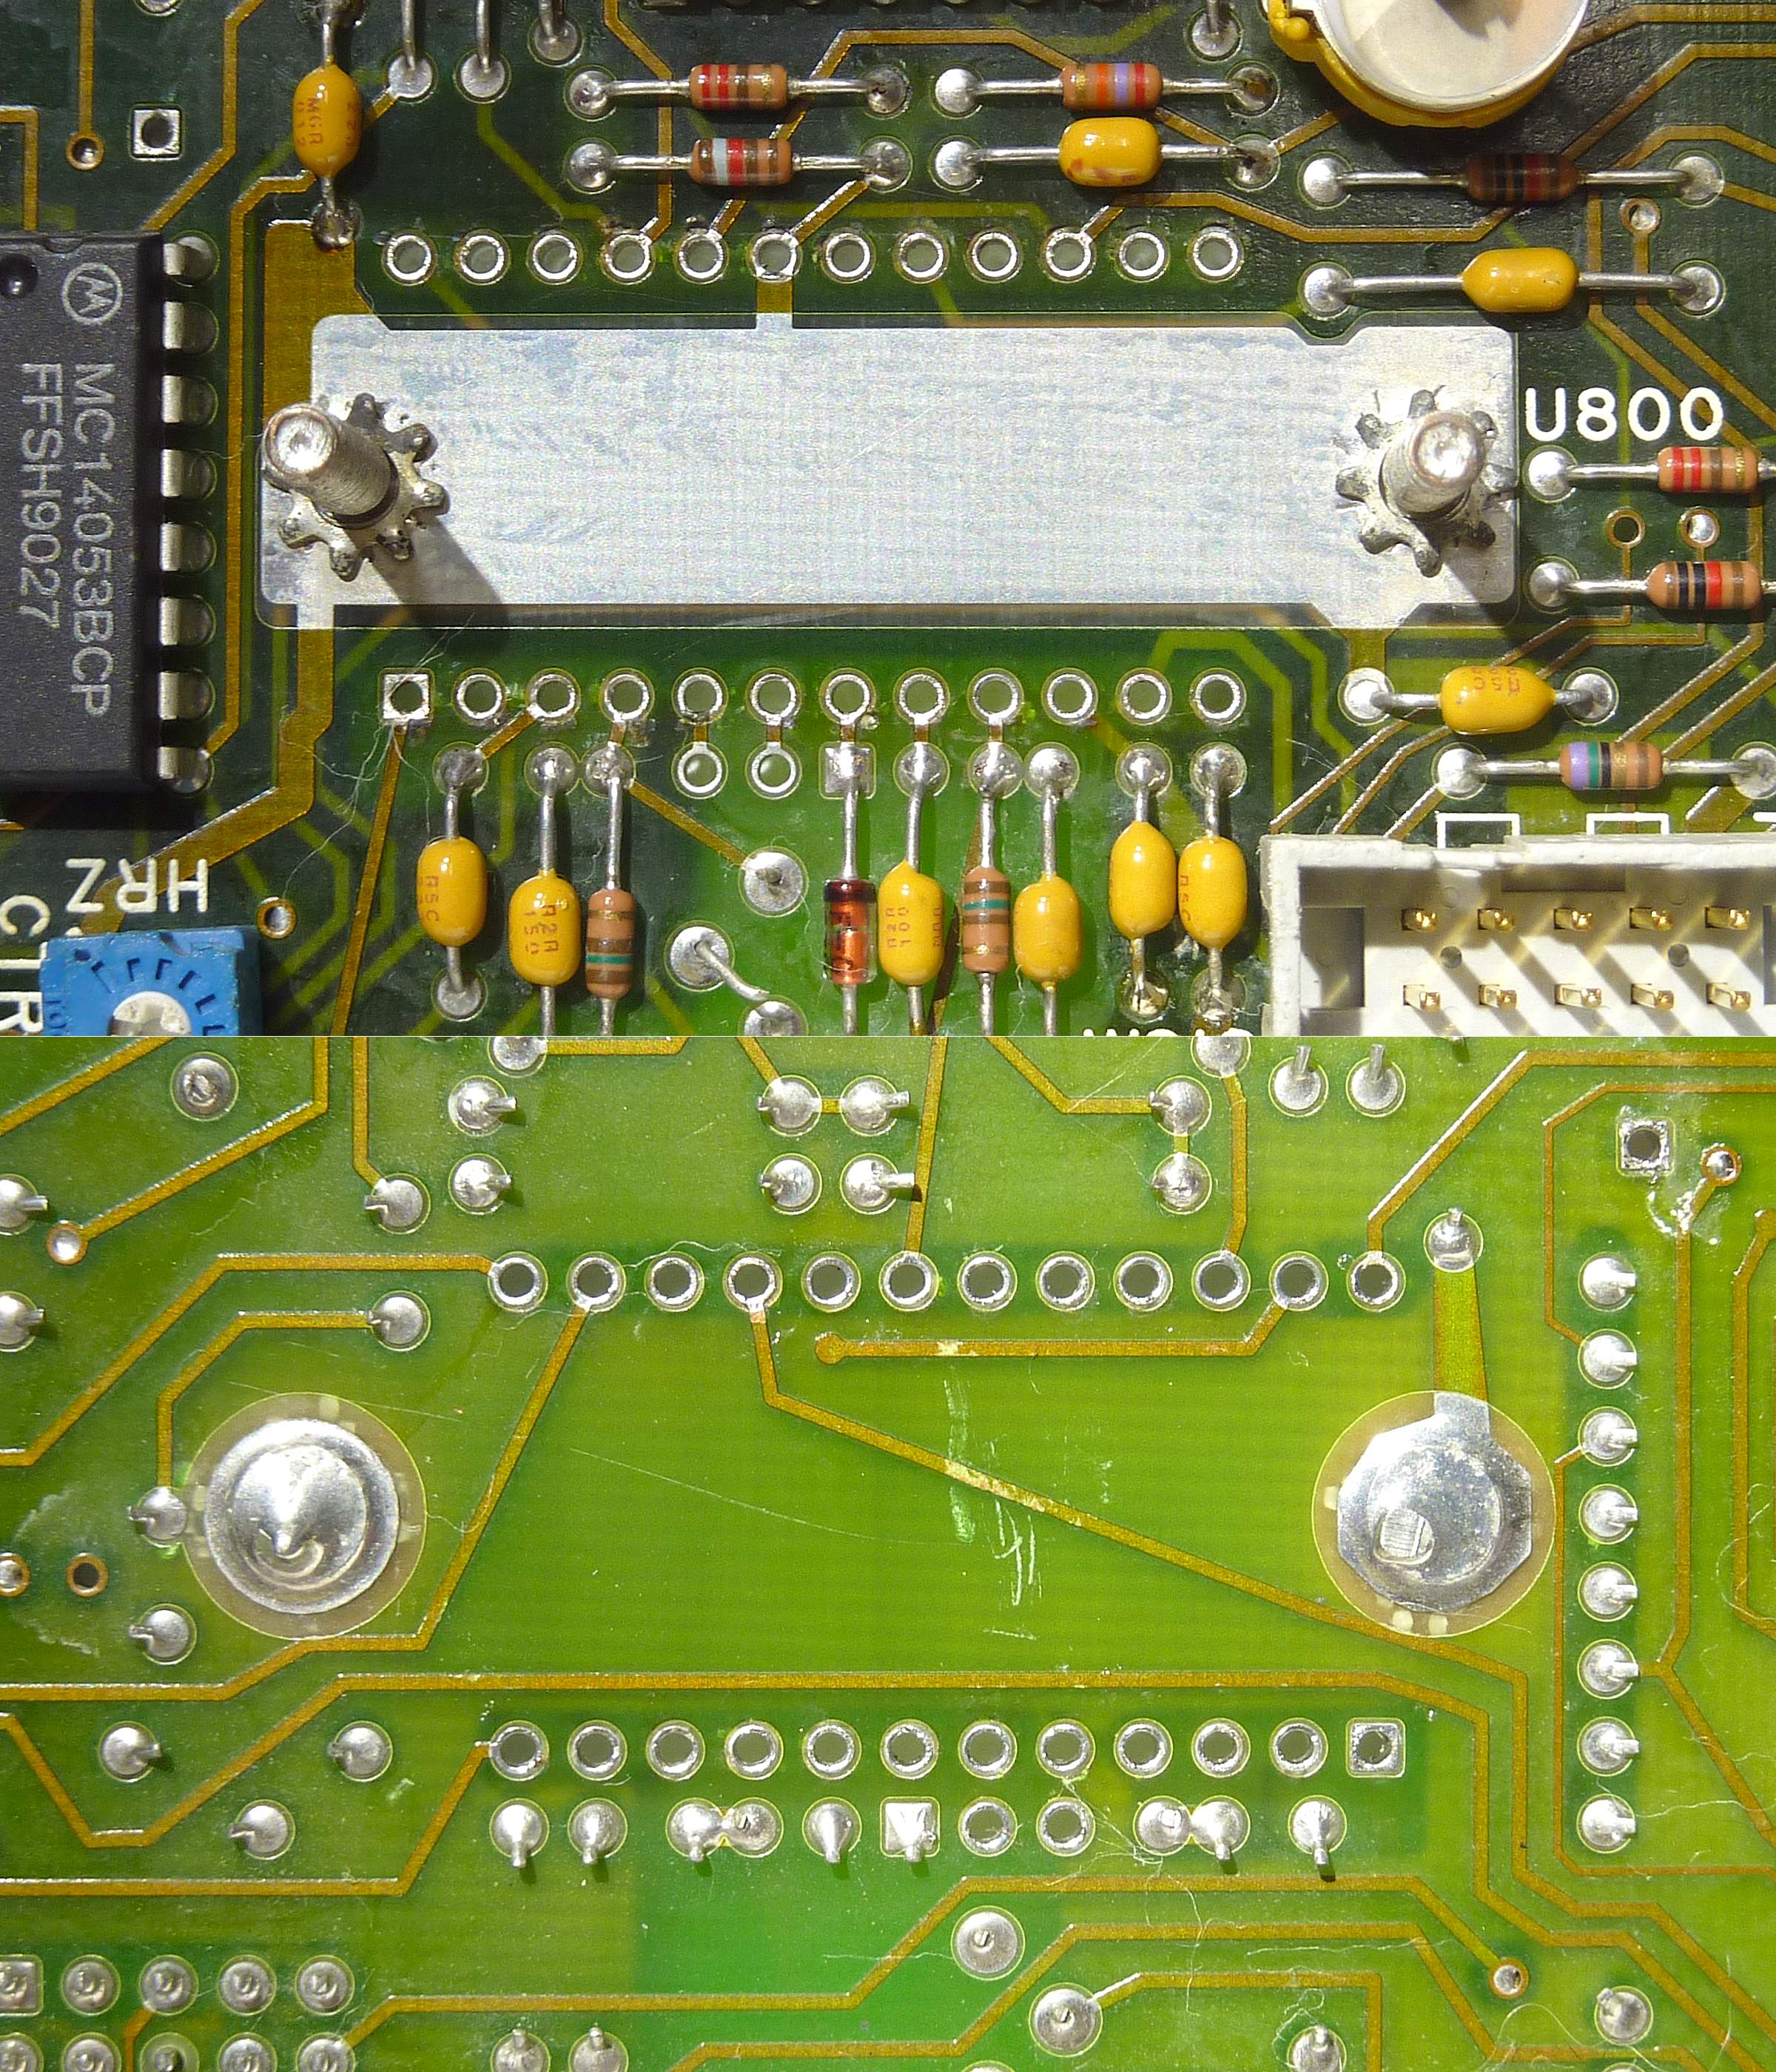
Edit: And in my general opinion messing at all with the U800 setup as it came from the factory might create serious problems were there where none, specially if undoing and reinstalling those two nuts onto the studs. Be very careful about the torque and evenness of both nuts or the delicate IC substrate will be damaged during the process, of possibly even further down the line due to thermal stresses added to improperly torqued down nuts.
Even they're installed with "right and perfect" torque, think again, these nuts serve no purpose at all. And may do more harm than good, its the thermal cycle that the chip endures, while its secured firmly, the expansion and contraction will stress out the die attached to the metal tab.
- Are they holding the U800 chip from falling out ? Nope, as the whole chip is soldered firmly on the board.
- Are they serve to improve the thermal conduction to the studs ? Nope, as both nuts use sandwiched 2 star washers, which is clearly not a good way to let the heat generated transferred from the tab to the studs. Beside the studs are not a good heat sink anyway.
Pic speaks thousands words.

Pay attention or maybe zoom in really close, watch for the tiny2 circled indentations around the hole, made by the star washer at the metal tab, definitely not good for thermal transfer from the metal tab to the stud.


