Boring Mundane Everyday Interesting Fun Project Print #772: Bracket for Matrexx 70 Case
My son and I are building his first Gaming Rig; A Ryzen 5/Aorus Elite machine with my old RX580 GPU. I'm kicking my old case down for the build; that way I get the fun of building mine into a case designed for dual AiO liquid-cooling.
One of the nice bits of this thing is a glass shelf inside; it is supported by a HDD cage in the PSU tunnel. For obvious reasons, I wanted that to go away, so I'm printing up this bracket to attach to existing architecture inside the case.
Printed in BLACK PLA, 215°C/60°C, 0.28mm LH, infill manually set at 1mm grid pattern (this to produce adequate rigidity as I need to hand-fit to get the screw holes exactly right), 1.2mm walls, 0.84mm top/bottom w/concentric pattern, no adhesion, no supports. Cura sez 1 hour 55 min; I'll report back with pics when it's been fitted.
I'm bumping print speed up again to 70mm/Sec; pray for me. 
mnem


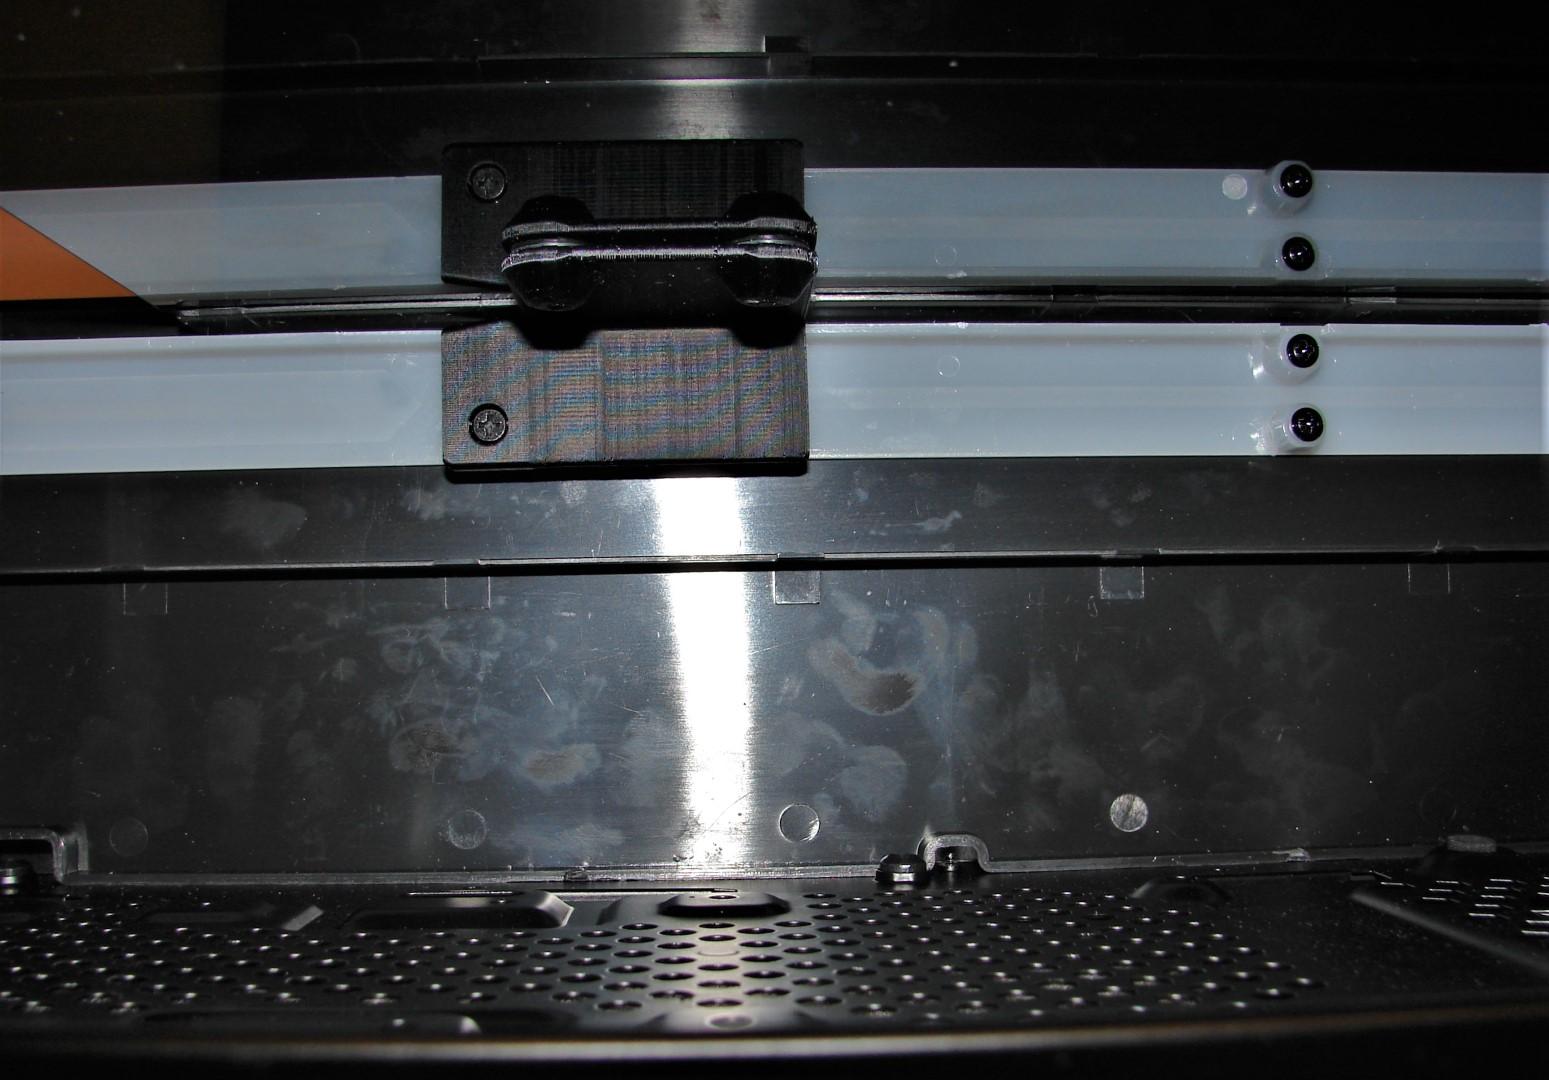


This took several iterations to get it exactly how I wanted it; end result is considerably different from the crude clip angle above.
However, fit is perfect and required zero modifications to the original PC case.

mnem
*back to father-son time*
Actually, going 70mm/s worked a treat on the T-bracket. Saved me more than a hour over the course of several iterations of trial & error getting to the final version that fit exactly as desired.

Dropping down to 0.12LH/0.20 nozzle on the Wherew0lf water pump badge was a bit of a hot mess; seemed no matter what different settings I tried, just made the cosmetics of the last few layers worse and worse.
In the end, I just kept the 2nd one I'd made at 0.20LH/0.40 nozzle.

The boi plotzed when he saw it anyways, and he loves it. Once it's inside under the glass side cover, I'm sure I'll be the only one who cares that it wasn't better resolution.

mnem
Never challenge Murphy. 
For more cool factor than just the application of 3D printed bits. Plenty of other reaction wheel stuff on the channel if it floats your boat.
Yeah... I linked to their partnership with VW a while back in the TEA thread. Will be interesting the see how this infant technology grows from first wobbly steps to a full-production gallop in a decade or two. Star Trek transtator-based Replicators are still a ways off... but the kind of fabbers from Schlock Mercenary could be here before I die.
mnem

Yeah; that's just the default from the creator's 3D Modeling program. I see that a lot; guess I'm weird in that I have my Frustion360 defaulted to black PLA material type.

mnem
You mean power-steering fluid.
mnem

Finally got around to opening
"The Box" today as I have another 'idea' percolating in my pile of grey matter
Of course the bits I want are at the bottom and the several heated printer beds are not shown

It will require 3D printing, 8mm rods and ballscrews and no electronics - what am I
You mean power-steering fluid.
mnem
Possibly that also, but they famously had leaky fuel tanks on the ground because of the thermal expansion at operating speed.
A former colleague's dad flew the SR71, what an airplane!! Yes, they did leak fuel which was a special type fuel, not the standard jet fuel. Many fascinating stories on-line, like the transportation from Lockheed Skunkworks to the test area 51. Here's a couple images from the Air & Space Museum from 2013.
Best,
A few more.
BTW a fun story behind these SR71s. Back in 1980s was an experimental program called Homing Overlay Experiment, see details here.
https://www.smdc.army.mil/Portals/38/Documents/Publications/History/Eagle%20articles/TheHomingOverlayExperiment.pdf?ver=2019-01-11-144934-457A video was made of the successful ICBM intercept in space will a "Kinetic Kill", and later provided to the media without an explanation of who took the video. The media assumed, as did most, that the video was from a satellite looking down on the ICBM intercept. Reality was it was from a SR71 that flew to max altitude, turning upside down and opened the underbelly doors and took the video!!
Impressive airplane indeed!!!
Best,
You mean power-steering fluid.
mnem
Possibly that also, but they famously had leaky fuel tanks on the ground because of the thermal expansion at operating speed.
A former colleague's dad flew the SR71, what an airplane!! Yes, they did leak fuel which was a special type fuel, not the standard jet fuel. Many fascinating stories on-line, like the transportation from Lockheed Skunkworks to the test area 51. Here's a couple images from the Air & Space Museum from 2013.
Best,
The fuel was JP-7, specially formulated to be extra-low volatility (due to Mach3 heat generation) and with lubricants added to serve as hydraulic fluid for all the power-assisted flight control surfaces. It was done this way such that the fluid was recirculated back into the tank for cooling, as it is essentially the biggest heat sink mass in a vehicle which is mostly fuel tank.
www.habu.orghttp://www.sr71.us/If you follow the links on these sites... you will be very deep in the rabbit-hole before you know it. Let us know how you fared when you resurface in a couple weeks.
mnem
"tongue-tied and twisted, just an earth-bound misfit; I..."
Already been down that rabbit hole ~45 years ago, still not out

Quite a bit of info about the SR71 in the early days as we supplied the IMU which were based upon the Electrostatically Suspended Gyros, ESG. I didn't work directly on these but a few colleagues did. Amazing stories behind the development and initial deployments, like something out of James Bond, even Tom Clancy would have liked these stories
Best,
Todays Useful Print idea and because filling 15 holes is 'aspirational'
Plan is to print it on edge with supports for the flange for strength and support marks will be completely hidden by the frame of the iron. Not on the printer yet just going to think about it some more. Rear row sits about 15mm higher but still 45mm of the tip is supported inside the block.
Heavy on the Layers and 20-25% infill at this stage.
EDIT Also tweaked it for a less aspirational and likely more 'practical' 5 Banger providing the sample one works out both will get posted.
Out of the stash of bits from a while ago there was two MKS boards I have dropped GRBL onto for CNC jobs rather than 3DP. Firmware upload was easy but no go on the stepper drives

Using the rule of checking voltages no Volts to the stepper Vmot so off to Github
https://github.com/makerbase-mks?tab=repositories which is fairly comprehensive in particular for a Chinese company
Schematics, BOM, Layouts and it turns out these boards have five fuses on them. Both have blown F2's 12 and 15A respectively in a 1206 package.
Guess which of the items I have NONE of in SMD

So the SMD equivalent of a 2" nail was deployed for 'testing' purposes until the replacements get here.
Easy fix and if you have a dud MKS or find a 'dud' it might be all that is needed if the former owner was a Butcher.
Smoothieboard is heading for my Laser but I was playing with Steppers on the bench so it was out of the box for a play.
More of an artistic (Mesh Mixer/Blender too) thing than a strictly Fusion thing but a nice simply way to take a 2D image and convert it into a Mesh then a Form and into a printable/machinable surface.
Should work best with higher contrast or grayscale images. Extrude it to a thin wall and make Lithophanes or like mine a flat base for inclusion into other projects.
Fusion addin
https://github.com/hanskellner/Fusion360Image2SurfaceSimple well explained how to
I found myself doing just that the hard way with the badge for my son's CPU cooler; eventually gave up and dropped the pic into one of those webpages that will generate a STL for 3DP lithophane. That's probably why I had so much trouble tuning the print for higher resolution; but at the end of the day... well, it was the end of the day and I was fucking tired.
mnem
So I think I need to stop watching 'recommended videos' on Youtube
The Random questionable device is an Eggbot. Already a heap of variations and derivations out there but if you have a junked 3D printer or a few spares you can make one for not much for no reason at all.
I am planning to make the sliders and arm assembly from Laser cut 4mm acrylic but fairly simple to tweak it to make the bits from 3D printed models. All the bits for the build so far came out of the recent Evilbay junk box including all the electronics which will be an Arduino Mega and Ramps Shield. Will fit from 100mm diameter Balls down to small eggs or less.
Still having a bit of a think on the clamping mechanism but two cups and the right side will have a shaft and spring of some sort.
Model here for a looksee up close or to take some measurements from
https://a360.co/2QumNYY
Has anybody tried printing drive belts with TPU or whatever, yet?
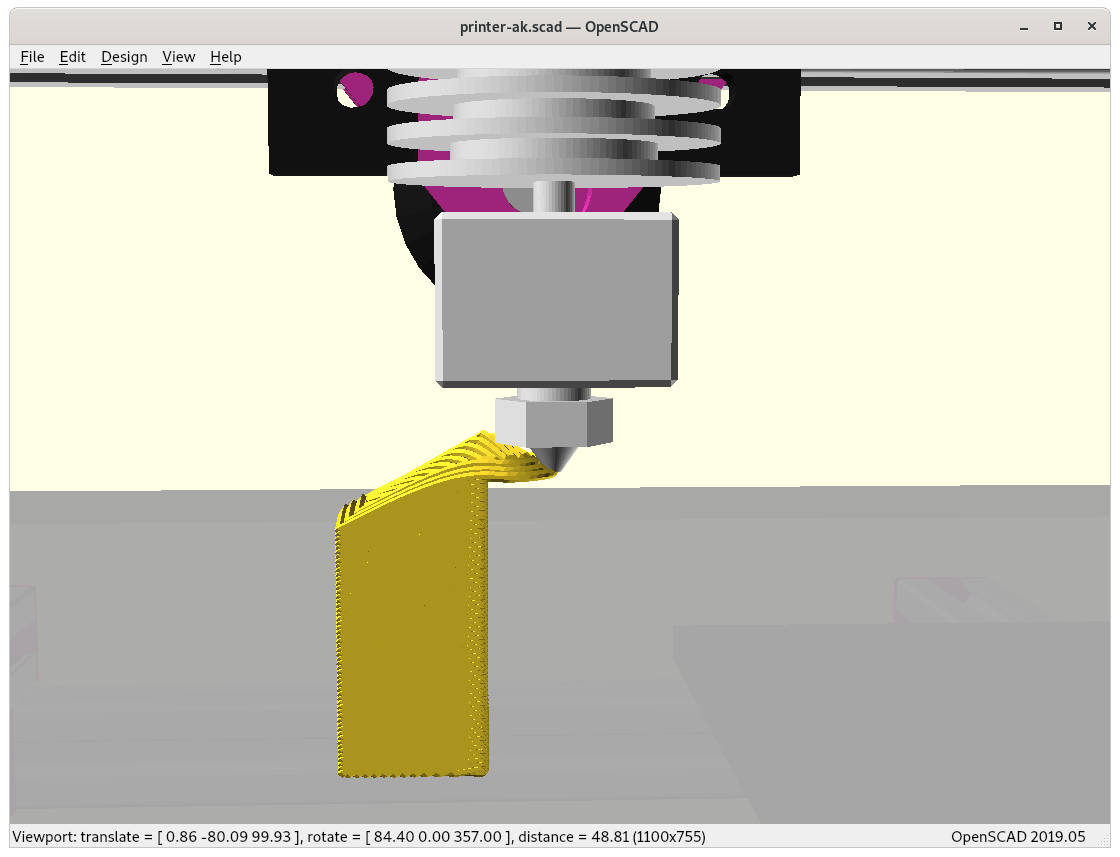
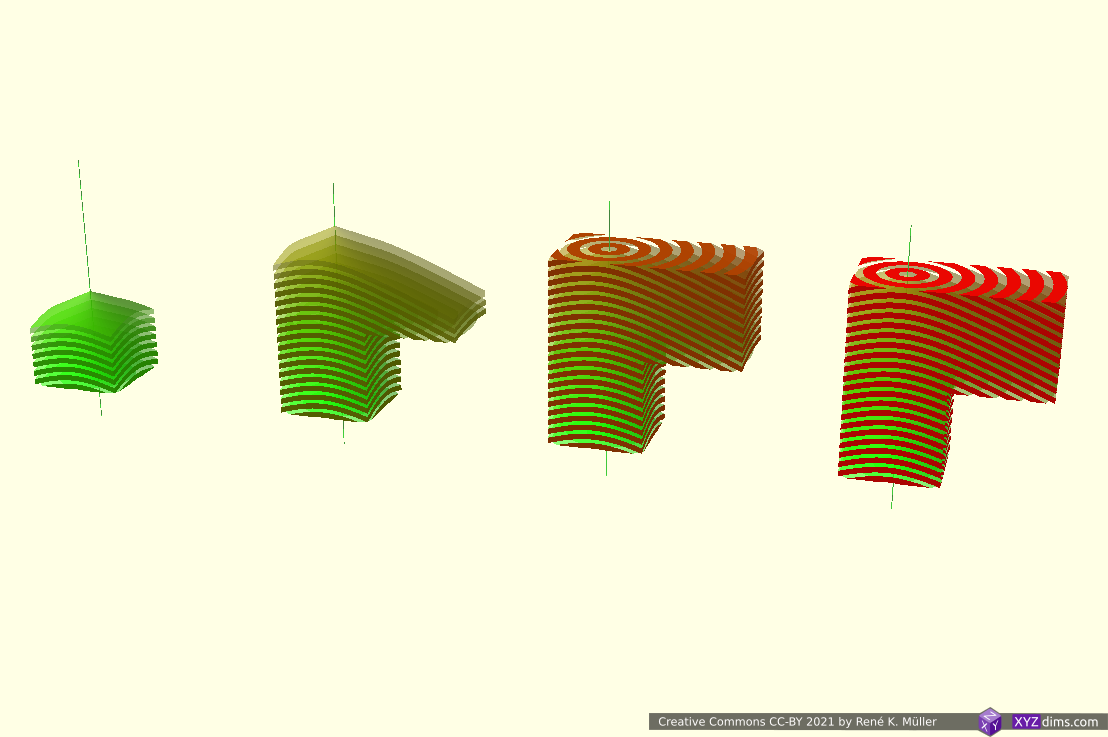
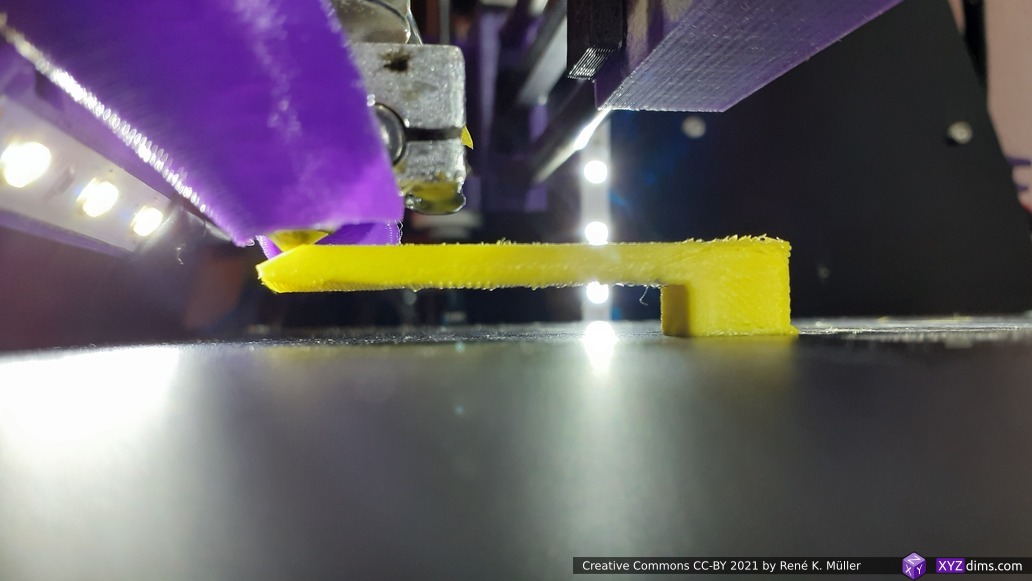
 90 degree overhangs without supports.... https://xyzdims.com/2021/03/03/3d-printing-90-overhangs-without-support-structure-with-non-planar-slicing-on-3-axis-printer/?s=09 Still a work in progress but really worth following.
 Patents on heated chambers is expiring so time for off the shelf heated chambers to become more widespread.