-
-
Hi guys,
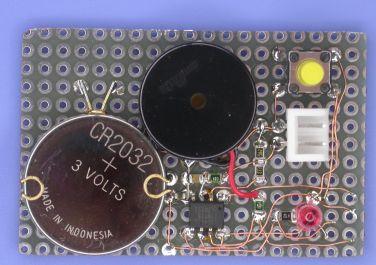
I'm working on a project using a perf board. I just powered it up, I discovered that my 5V rail wasn't up. Quick poke around the board and I found that my 5V rail is shorted to ground, somewhere.
I only have a simple, mediumquality 3.5 digit DMM, and the smallest resistance range is 200 Ohm. So no matter which two points on my ground and 5V rail I pick, I measure 0.7 Ohm.
Do you guys have any tips on where to get started? I am gonna give it a second visual inspection after cleaning it like a madman to get all the flux off so I'm sure I don't miss something. I've also been tempted to find one of my old PC supplies and try just forcing a few amps through and see what smokes.
I could also try and make some kind of makeshift low resistance measurement thing (constant current source and a basic amplifier into my multimeter?)
-
#1 Reply
Posted by
Buriedcode
on 19 Apr, 2017 11:00
-
A simple continuity test (your <200ohm setting on your multimeter) should be enough. I have never needed anything more than that and a good eye.
You could also suspect any semiconductors across the rails - often they tend to fail short-circuit.
For stripboard (perfboard with tracks) you can run the back of a craft knife down between the tracks to break any small solder bridges and also break up flux.
-
#2 Reply
Posted by
TimFox
on 19 Apr, 2017 16:21
-
Also, look for polarized (aluminum or tantalum electrolytic) capacitors installed reversed across a rail.
-
#3 Reply
Posted by
Siwastaja
on 19 Apr, 2017 17:29
-
I typically apply a few amps of short-circuit current from a current limited lab supply, then use the smallest 0.1mV range of a multimeter to "poke around" the traces to see the voltage drops. This way, you can measure the miniscule resistance and find the short in no time.
-
#4 Reply
Posted by
Pitrsek
on 19 Apr, 2017 17:42
-
-
#5 Reply
Posted by
sahko123
on 19 Apr, 2017 18:17
-
Another issue might be a faulty microchip which has shorted internally. If the chips are socketed try removing each individual chip one by one(if there are multiple). If the board doesn't have any chips try taking out the individual components. might take a while but worth a try.
-
#6 Reply
Posted by
danmcb
on 19 Apr, 2017 19:05
-
take a watchmakers screwdriver or something sharp and run between the tracks. There can be tiny flecks of solder that are hard to see.
check thoroughly for wiring errors
if you cut holes to break the track, check they are really cut
use an eyeglass and good light - sometimes you can't see without. x4 is a good magnification I find.
-
#7 Reply
Posted by
KL27x
on 19 Apr, 2017 19:13
-
Run a half an amp and feel for warmth? Spray bottle of alcohol and see where it dries up?
When all else fails, cut your power rail in half. Test both halves for a short. On the half with the short, repeat this process until you pin down the location. Just mark your cuts, clearly, so you can fix them, after the fact.
-
#8 Reply
Posted by
james_s
on 19 Apr, 2017 19:24
-
Connect it to a high current power supply and see what blows up

Or just follow your ground and power rails and look closely for bridges or other wiring errors.
-
#9 Reply
Posted by
danmcb
on 19 Apr, 2017 19:27
-
Connect it to a high current power supply and see what blows up
works pretty well as a last resort on PCB's with hairline shorts! but these days that doesn't seem to happen if you go to a decent supplier.
-
#10 Reply
Posted by
james_s
on 19 Apr, 2017 19:29
-
I have actually used a similar technique from time to time, but it isn't something I recommend unless one is really desperate. A slightly more gentle approach of feeding it a reasonable limited current and feeling around for warm parts is a bit safer.
-
#11 Reply
Posted by
danmcb
on 19 Apr, 2017 19:33
-
aw come on. we all need our Swedish chef moments now and again. It's part of the fun!
-
-
-
#13 Reply
Posted by
rob77
on 19 Apr, 2017 21:08
-
Connect it to a high current power supply and see what blows up
but definitely wear eye protection ! ICs can send out nasty shrapnel when blowing up

-
#14 Reply
Posted by
james_s
on 19 Apr, 2017 22:27
-
aw come on. we all need our Swedish chef moments now and again. It's part of the fun!
Bork Bork Bork!!!

-
#15 Reply
Posted by
mubes
on 20 Apr, 2017 16:32
-
Pump a couple of hundred mA into the board and spray with enough freezer spray to form ice. Where there ain't no ice, go looking.
...And wear goggles. Nasty things can happen to pretty much any component under short conditions.
Dave
-
#16 Reply
Posted by
bson
on 21 Apr, 2017 01:20
-
If your DMM is sensitive enough you can put one probe on +5V and the other on GND, then simply move them one at a time in the direction of lowest resistance.
-
#17 Reply
Posted by
Luminax
on 21 Apr, 2017 07:15
-
If you're going with the kaboom approach... make sure you have a video camera ready so you can submit to EEVSmoke
All joking aside, can we get some screenshot top and bottom ? maybe we can spot something
-
#18 Reply
Posted by
cvanc
on 21 Apr, 2017 12:32
-
^^^What Luminax said. Post some nice clear photos here on the forum and get more eyes on the problem.
-
#19 Reply
Posted by
tszaboo
on 21 Apr, 2017 13:31
-
It is surprisingly easy. You increase the current limit on your power supply, until the short disappears or its starts smoking. First case, the problem is already solved, second it is easy to detect.
-
#20 Reply
Posted by
SouthPark
on 21 Apr, 2017 14:48
-
Check to see if you didn't inadvertently leave certain tracks connected that aren't meant to be connected.